Say Hello to Spring with Food Choices

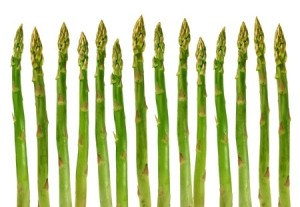
18547390_SSome foods simply say spring. For those who live in the Midwest, asparagus is the first spring vegetable to appear. It grows right out of the ground, looking just like the spears to the left. From the small tip appearing to this size only takes a few days. Cut it off and another appears shortly.

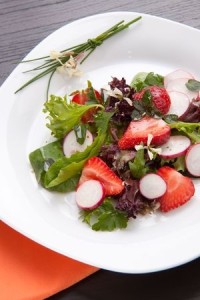
Baby lettuce is another spring visitor. Before it gets too hot here in Arizona you can grow almost any kind of lettuce. Once again, just pick the outside leaves and the lettuce plant will continue to grow, or harvest several varieties while they’re still small and make a delicious fresh lettuce salad like the one in the photo below.

6043889_SRadishes and strawberries also fit the spring mode. Radishes can be planted the minute it’s warm enough to put out seeds, and they have a very short growth period, so you can harvest them when all of your other vegetables are still in process. Strawberries tend to produce in the spring, but you can buy ever bearing varieties that will give you fruit for a longer stretch.

Even if you don’t have a garden, spring is the best time to pick up these fresh ingredients in the grocery store or farmer’s market.

Cook your asparagus gently in the microwave or steamer and just add a little butter and lemon juice and they’re ready to eat. The salad shown will shine with a light vinaigrette. Mix olive oil, a delicate vinegar such as white wine or raspberry, a bit of Dijon mustard, salt, pepper and a hint of sugar to your taste. You can also sweeten it with fruit juice to add more of a fresh fruit flavor.

This salad also works well with fresh blueberries or raspberries. You may even be able to get your salad-resisters to give a dish like this a taste.

Say Hello to Spring with Projects

20849225_SIf you’re looking for a way to give your home a blast of spring color and mood, consider visiting Pinterest for some ideas. Our Fulton Homes Pinterest site has a board “Everything Spring.” with bunches of fun spring photos, design ideas and projects for you to bring the season into your home.

Let’s take a look at a simple and fun way to add an unexpected touch of spring to any room in your home. The photo to the left shows a flurry of paper butterflies in bright yellow. You can cut and set these up in an afternoon, and have a fun wall that says spring in no time.

For paper, visit your local scrapbooking store and investigate your choices. Or you can hit an office supply or paper store. This yellow is available in the Astrobright line of papers in standard paper weight or card stock if you want a sturdier display. You can also find a vivid pink or bright light green in this line of paper.

It looks like these butterflies were cut with a die-cut paper machine – available at hobby stores. The perfect size and shape of these butterflies makes that clear. But there’s no reason not to simply cut your own. A little variety in the look of the butterflies would add charm to the presentation. You could also add flowers and leaves in other colors. Double-sided masking tape or masking tape loops will hold the butterflies to the wall without any permanent damage. You might want to include any children in your life on the project – or just keep it to yourself and have the kids wake up to discover that spring arrived while they were sleeping.

Linking Kitchen and Dining Spaces

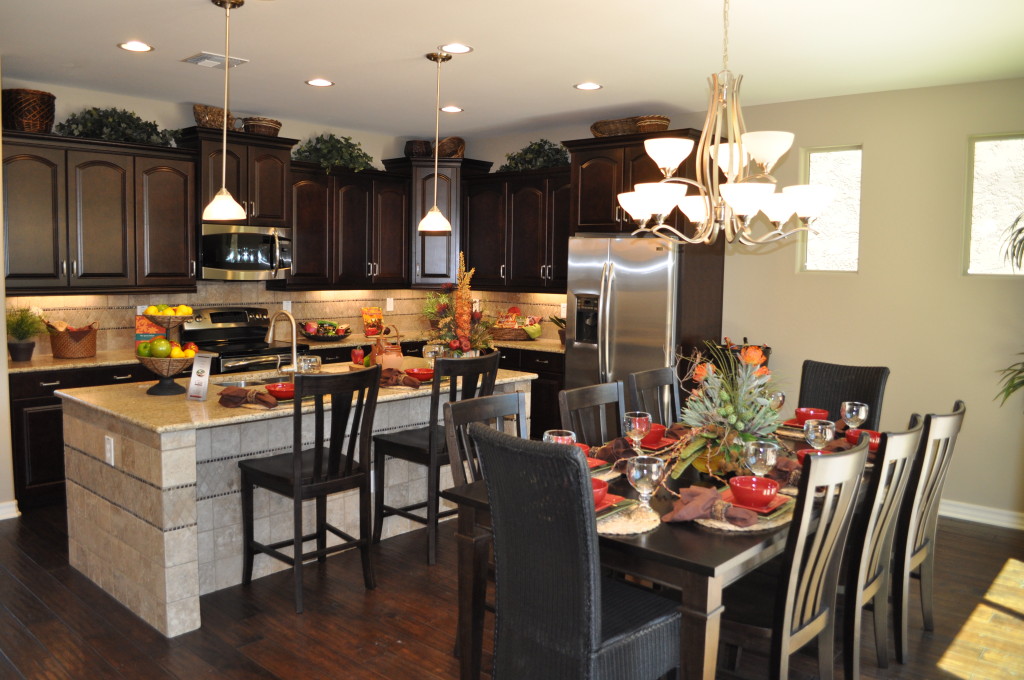
Kitchen20and20Nook20DSC_0244With an open floor plan it’s easy to connect with friends and family when fixing a meal. The distance to the table is short, making the transfer of food to table and dirty dishes back only a few steps.

If you have lived in a home without this kind of space, an open floor plan is a luxury indeed. But planning the décor requires attention to make the space feel unified. This Fulton Home model demonstrates how to connect the kitchen with the dining space. Let’s take a look at some of the decisions that make this space work so well.

Flooring: By staying with dark wood flooring throughout, everything feels like one room. The island provides the only break between the kitchen and dining table.

Cabinetry & Furniture: The cabinetry in the kitchen and the dining table and chairs coordinate in wood tone. Another connection comes when the chairs at the island sport the same design as the dining chairs. This keeps the one-room feeling intact.

Lighting: Although the pendant lighting above the island has a different function than the chandelier in the dining area, the glass globes are the same shape and both have the same brass finish. They are from the same family of lighting fixtures and they help integrate the space beautifully.

Accessories & Colors: The dishes, flowers and kitchen décor mirror the dining table’s tablescape. This causes your eyes to travel freely around the entire space without a pause. A difference in color or style from kitchen to dining room could create a jarring interruption.

If you are moving to a home with an open floor plan for the first time, be sure to factor the need to integrate several spaces into your design and décor plans.

Cozy Play Space

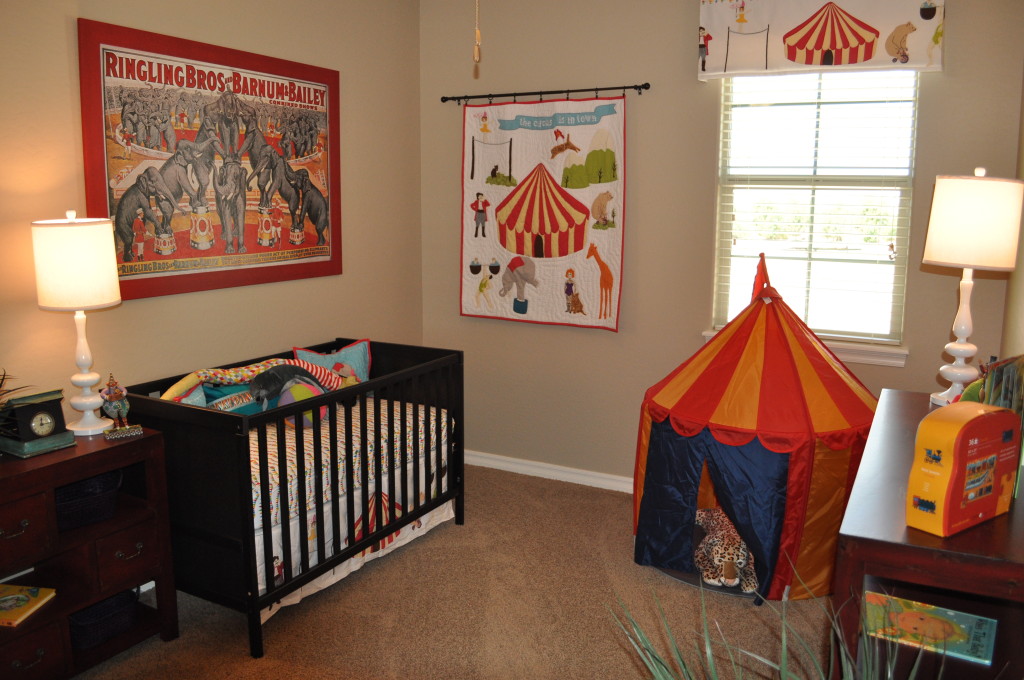
Bedroom20DSC_0256Little ones love little spaces, places where they can tuck themselves in and feel safe, a bit hidden, and above all, in proportion to the world around them. For a child everything is so big and mostly out of reach. A cozy space just big enough for one or maybe two children makes everything better.

This children’s room makes a point of providing that hiding place, perfect for retreat when the world seems more than a bit overwhelming. The little tent, in a circus theme to fit the room’s décor, creates the opportunity for imagination, storytelling and even a bit of adventure. Please pay attention to the fierce tiger playmate in the tent waiting for a chance to pounce.

When planning a small child’s room, be sure to make room for a little nook, hidden corner or just a chance to feel the right size for once instead of so very small. Choose a pint-sized table and chair set, an easy chair made child-size, a canopy surrounding the bed or even a desk or dressing table with a drape concealing a small toddler-sized place.

As your child gets older, old enough to reach the sink for his or her own drink of water, old enough to use the microwave instead of having to ask someone else for help, the need for a cozy space will fade. The desk will become just a desk, the tent will go into the attic or be given away, and the world won’t feel quite so overwhelming. But until then, be sure to make a small space for your small one.

Sofa/Coffee Table Alternative

Loft in the Fulton Homes Daylight Model

Loft in the Fulton Homes Daylight Model

Most people would be inclined to put a sofa in this cozy loft space. But if you think just a little outside the box, you might make other choices.

Is this space a family TV area or a nook for mom and dad to watch a little late-night news or a talk show after the kids are in bed? Or maybe it’s just the two of you, or just yourself with a habit of taking a break in front of the television.

Instead of a sofa, consider the comfort of a couple of chairs and ottomans. These chairs, although armless, are cushy enough to sink into. Choosing two smaller ottomans rather than the traditional coffee table allows each person to create their own space. One might turn over the top cushion to use the tray underneath for a snack. The storage in each ottoman provides the opportunity to tuck away a good book, reading glasses, and even the remote.

Anyone who loves to sew, crochet or knit in front of the TV will appreciate that storage space, making it easy to place projects out of sight when not actively working on them. This is particularly useful if you’re working on surprise gifts for family members.

The ottomans are light enough to move around as you choose, and the cushion on the top creates additional seating for occasional extra viewers. Add in a few floor pillows and the whole family could curl up to watch something special on a Saturday night.

So don’t jump into a sofa purchase immediately to fill up a space like this. Consider the flexibility and comfort of chairs and ottomans instead. They make a room seem larger while still supporting all of your plans for the space.

Make the Most of your Kitchen Island


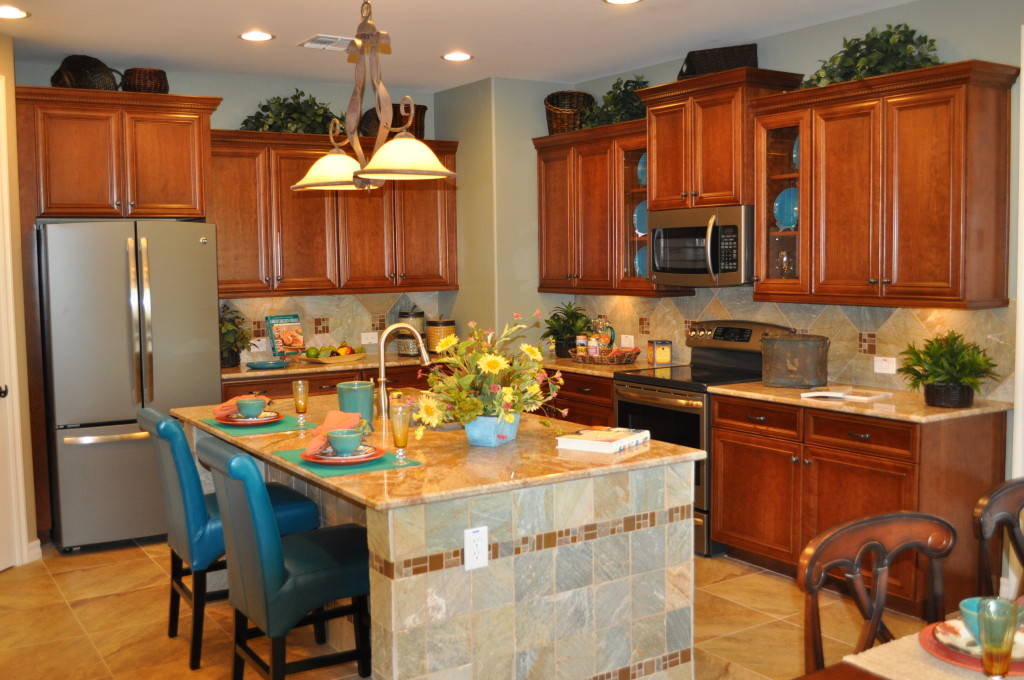
Fulton Homes Daylight Model

Fulton Homes Daylight Model

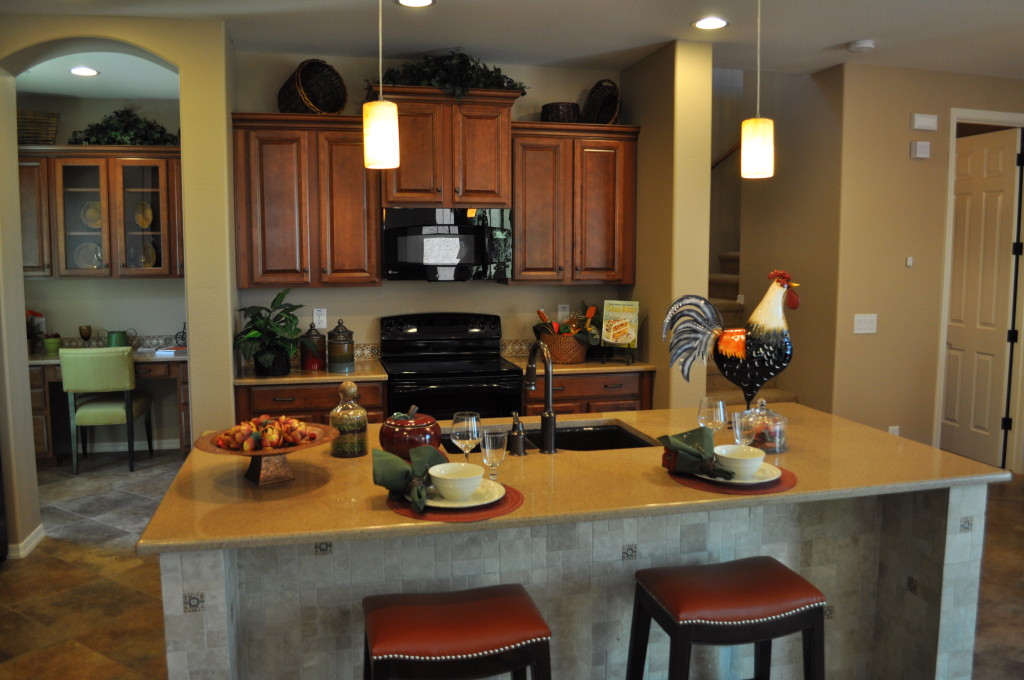
Kitchen islands create a better work situation in a kitchen, particularly when you have more than one cook. For example one person can chop vegetables while another pulls seasonings from a cabinet.

Or with a sink in the island like this one in the Daylight model of the ____ community, one person can stay ahead of the dishes when preparing for a party or big family dinner.

But an island also plays a role outside of cooking. How about using it as a place for appetizers as people arrive for a party? It provides a central location to draw people together as they get to know each other – people will always follow the food. You can start moving appetizers into the family room as your guests get more comfortable and break into smaller conversational groups.

A kitchen island makes a dynamite location for a buffet. Traffic can move on all four sides, and the trip from the kitchen is just a step. This works particularly well for hot or cold food that you want to keep refreshing. Setting chairs and tables in other parts of your home will encourage people to help themselves to food and then settle elsewhere.

When it’s just a few family members, eating at the island opens up a cozy setting for two or three. It’s also a great place for breakfast when family members are short on time and have staggered departures. Just provide plates and platters of food and everyone can help themselves. Or how about a cereal bar – several types of cereal, bowls, milk and extras such as raisins and fruit?

Look at your island as the kitchen’s stage, and you can take advantage of it for all of your food performances.

Outdoor Living – Many Choices

Courtyard DSC_0273 (2)

Fulton Homes Daylight Model

Now while we’re in the outdoor living stretch in Arizona, take a few minutes to think about how you want your yard to function. Do you enjoy having your coffee and reading the paper in comfy chairs outside in the morning? Are family dinners more fun outside? Should there be a spot for the kids to play, or is your focus entertaining and your dream a plush outdoor kitchen?

This time of year it’s tempting to buy outdoor furniture first and then arrange the space, but you may find yourself with pieces that don’t coordinate, or that don’t meet your real outdoor goals. Just a bit of planning can help you create a space that looks beautiful and really works for you.

Take a look at the table in the foreground. It seats six comfortably, and you could put three chairs on a side and make it big enough to handle eight. Planning a larger party? How about using the table as a buffet, and arranging the chairs around the yard. The raised planters have a nice wide ledge that’s perfect for perching with a plate.

The fact that the two chairs in the background are the same color as the dining set but a different material and style keeps this yard from being too matchy-matchy. With today’s amazing weather-proof fabrics, you can find cushions that can handle the outdoors in a rich selection of colors and prints. Adding cushions to the dining chairs in a stripe that picks up the rust from the easy chairs would pull everything together beautifully.

With careful thought and shopping, you can make your backyard lovely, functional and versatile enough to meet all of your outdoor plans this spring.

Cooking with your Kids Lesson Three: Cookies

12974804_SAre you prepared for the challenge of lesson three in cooking for kids? Cookies provide a great way to get your children comfortable with measuring, mixing, and combining ingredients in the right order. However, you should probably prepare to deal with a very messy kitchen at the completion.

One approach that will help minimize the mess and confusion is a common chef approach – creating a Mise en place – which involves pre-measuring and preparing all of the ingredients. Using small bowls or cups, have your children measure every ingredient and line them up in order. In the case of cookies where the dry ingredients need to be mixed together then added to the mix of wet ingredients, you can sort the smaller containers into wet and dry sections so that it is easier to follow the directions to make the cookie dough.

For a first batch of homemade cookies, choose a simple drop cookie recipe and one that can take a beating such as oatmeal cookies. You may want to use parchment paper under the ingredients during the measuring and assembly process to limit the waste. Parchment paper also keeps cookies from sticking to a cookie sheet and makes clean-up afterwards much easier.

If you’re introducing more than one child to baking, you may want to have each child take turns with measuring and mixing. Think about making cookies that involve simple stirring rather than beating. You may want to assign the oldest to read the recipe so that everyone knows all of the steps.

You may end up finishing the baking once the first batch or two come out of the oven, but it’s worth the time and effort to watch your next generation of bakers in action.

Cooking with your Kids Lesson Two: Pizza

14452519_SOnce your children are comfortable assembling tacos, salads or other simple meals, the next step is combining ingredients to create a finished product such as pizza.

No, you don’t want your children to imitate the boy in this photo, but they can spread the dough in a pan and put on tomato sauce and toppings.

Many stores carry fresh pizza dough ready to bake. Look for one with few or no preservatives, and possibly a whole wheat crust. Once the toppings are on, most kids won’t notice the difference.

To discourage debates on toppings, have each child select one or two favorites, and make mini-pizzas so everyone gets to make his or her own round dough foundation and top it as they each choose.

As the parent, you are in charge of quality control. Pizza dough can be spread with the fingers, but keep an eye out for unintentional holes or extremely uneven surfaces. This can make one part burn before another section is done. You may also want to monitor the level of toppings, particularly the cheese.

While you want to keep an eye on the things, this is also an opportunity to let your child make a few mistakes and learn from them. Too many toppings may create a pizza that is goopier than preferred. An uneven pizza crust may not be as tasty as expected. Don’t try to make everyone’s pizza perfect; the real goal is to encourage them to have fun and appreciate the process. They can also benefit by learning from any mistakes.

Wrap up the lesson by showing them how to tell when their pizzas are properly baked. Use the light in your oven to show them how to look for bubbling in the middle and browning of the crust on the edges. Individual pizzas provide a great second phase of your cooking lessons.

Cooking with your Kids Lesson One: Assembling Tacos

15916341_SMany parents want their children to eat healthfully as well as learn the basics of making a meal. But it’s hard to figure out how or even when to start. In the midst of getting dinner ready, dealing with homework and other responsibilities, teaching your child to cook can go by the wayside. Here are a few suggestions to get started easily.

Choose simple foods your children already like. Do your kids like hot dogs or hamburgers? Perhaps they love Mexican or Italian foods. They’re much more likely to want to help make meals that they enjoy.

Focus on assembly rather than more complex tasks. Your six-year-old probably shouldn’t be handling a sharp knife, but he or she could work with already-chopped vegetables. Children can also stir bowls – though not hot pots – and add ingredients.

Start with one meal. Tacos provide a good choice for a meal that is easy to assemble and are often a general favorite. Put the various ingredients into smaller bowls with spoons or forks so that it is easy to select each item. You may want to use hard shells because they are easier to coordinate while filling.

In addition to various favorites, over time you might want to include some healthful additions such as the raw peppers shown here. Select several colors to make them more inviting.

You may find that initially your children will pile on the cheese and sneer at the vegies, but consider asking them to take at least one piece of everything available. Creating meals that involve some interaction before eating is a great way to introduce your children to the pleasures or preparing food, not just eating it.