Mouthwatering Roasted Brussels Sprouts

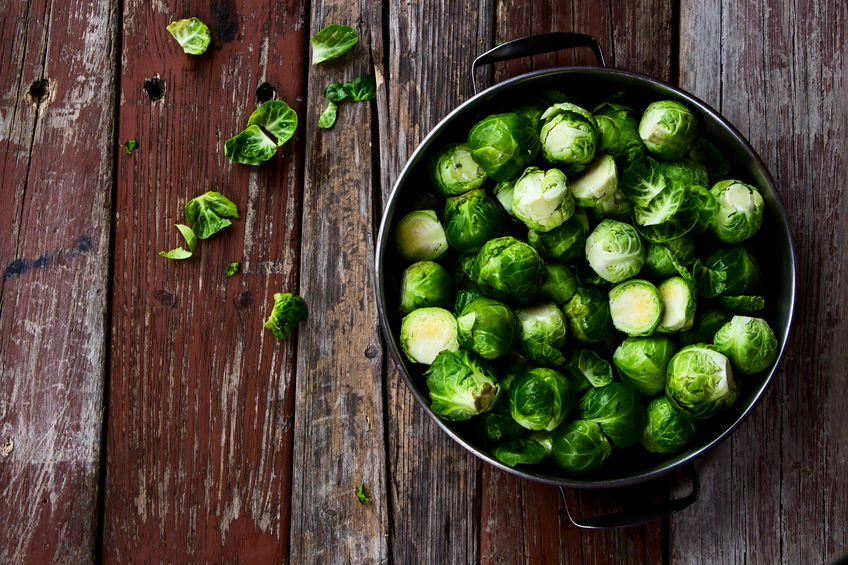
Are you like everyone else and just now falling in love with brussels sprouts? If so, the way you prepare them makes all the difference in the world! This recipe is so easy and has the added flavor of balsamic vinegar and tasty bacon. Enjoy!

Ingredients:

  • One pound brussels sprouts (Make sure you trim them) 
  • One tablespoon olive oil or extra virgin olive oil 
  • Two tablespoons balsamic vinegar 
  • One-fourth teaspoon black pepper 
  • One-eighth teaspoon sea salt 
  • Two slices bacon (Cook till crispy, drain the bacon and then crumble. To bake pork bacon, place slices next to each other on a rack in a foil-lined shallow baking pan with sides. Bake for eighteen or twenty minutes until bacon is crispy. Drain well on paper towels) 
  • Two teaspoons finely shredded, fresh lemon peel 

Directions:

  1. Preheat the oven to 400 degrees F. Make sure you cut large brussels sprouts into lengthwise quarters. If you have small brussels sprouts, cut them in half. Take a large bowl and mix together brussels sprouts with one tablespoon of the balsamic vinegar and the extra virgin olive oil until all of the brussels sprouts are coated lightly. Salt and pepper to taste and toss the ingredients and make sure everything is coated. 
  2. Place the brussels sprouts in a single layer on a baking sheet. Roast for about twenty to thirty minutes or until the sprouts are brown and tender (turning about every ten minutes). 
  3. Now transfer the brussels sprouts to a large bowl. Drizzle the leftover, one tablespoon vinegar, and sprinkle with the crumbled bacon. For personal preference, you can garnish with a fresh lemon peel. 

Note: The sprouts will take about twenty minutes to prepare and ready to eat in about 40 minutes. 

We hope you enjoy! Let us know what other recipes you would like to see by sharing your ideas with us in the comment section. Thanks for reading!

St. Patrick’s Day Cookies: Matcha Green Tea Shortbreads

With St. Patrick’s Day being a month away, you have got to try our Matcha Green Tea Shortbread cookies. Yep, we are talking about fresh-baked, chewy, and soft cookies that are everso delicately flavored. It is a tea cookie inception!

Our cookie is not too sweet with the unique matcha flavor that is so delicate and special. These green tea cookies are soft, pillowy, and pair perfectly with tea. Please do not overlook the beautiful color that is just perfect for St. Patty’s Day cookies.

Ingredients:

  • 2 cups bleached all-purpose flour
  • 1 to 2 tablespoons Matcha green tea powder
  • 2 teaspoons salt or sea salt
  • 1 cup unsalted butter at room temperature
  • ½ cup powdered sugar (add more or less depending on personal preference)

Directions: 

  1. Sift the flour, matcha green tea powder, and salt into a bowl. 
  2. In a mixing bowl, beat butter and powdered sugar until fluffy. 
  3. Add flour mixture to a mixing bowl and mix slowly until dough just comes together. 
  4. Pull and roll dough together carefully into a log, about two inches in diameter. 
  5. Wrap dough logs in cloth or wax paper and place it in the freezer for thirty minutes or until the dough is firm to the touch. 
  6. Slice dough into ¼ inch round pieces and place 1 inch apart on a parchment-lined cookie sheet. 
  7. Bake in a preheated oven at 325 degrees for 16 to 18 minutes until cookies are a light golden brown around the edges – turning the pan halfway through the baking time. 
  8. Remove cookies immediately and place them on a wire rack to cool. 
  9. Store in an airtight container or wrap and freeze. 

We hope you enjoy your Matcha Green Tea Shortbread Cookies, and Happy St. Patty’s Day!

Cauliflower Rice with a Mediterranean Twist

Are you on the fence about the taste of cauliflower? We were not quite sure about how delicious cauliflower can really taste, so we decided to try this recipe with a Mediterranean twist. Boy, are we glad we did! Spruce this recipe up with a few extra ingredients, and we are sure you will love it as much as we do!

Ingredients for Cauliflower Rice:

  • One medium to large head of cauliflower 
  • Two cloves garlic, minced or pressed 
  • One 1/2 cup sliced almonds 
  • Just a pinch of red pepper flakes (optional)
  • Two tablespoons extra virgin olive oil 
  • One tablespoon lemon juice (fresh if available)
  • One 1/4 teaspoon sea salt 
  • One 1/2 cup flat-leaf parsley – chopped well 
  • Top off with fresh ground pepper for taste 

Directions for Cauliflower Rice:

  1. Cut the head of cauliflower into medium chunks and throw away the core. Put a small amount in your food processor until the pieces are broken into small pieces. Now you have the rice. 
  2. Wrap the cauliflower rice in a kitchen towel and twist well to remove as much water as possible from the rice. Actually, during this step, you will see how much water was in the cauliflower. 
  3. Now toast your almonds in a large skillet over medium heat, making sure to stir often, so they do not burn. Once they start to turn gold and you smell them, they are ready. This usually takes about four to five minutes. Place in a bowl to cool. 
  4. Take the skillet and return to heat while adding olive oil and garlic. Make sure to keep stirring until you smell the garlic. This only takes about ten to twenty seconds.  
  5. Add the cauliflower rice, red pepper flakes, salt, and stir well to blend. Now cook for about six to ten minutes until the rice turns golden. 
  6. Remove the skillet from heat and stir in your cooled off toasted almonds, parsley, and lemon juice.  
  7. Season to taste with sea salt and black pepper. Serve warm. 

Prep Time: 20 minutes | Cooking Time: 15 minutes | Serving Size: Four Servings as a Side Dish

Gas Versus Electric Stovetops

The stove is an essential element of any kitchen. Your stove can serve many purposes for cooking all sorts of meals. When it comes down to which stove is right for you, there are two general stovetops to consider: electric or gas. Both are excellent choices, but like anything, they come with their own sets of pros and cons. You will want to consider both options and look at which set up may be more ideal for your home.

Electric

Electric stoves are generally going to cost less money. Typically, most houses are preset to have an electric stove installed in the kitchen. They are easy to clean with a very smooth surface. They can also turn on by simply turning a dial and do not require an ignition. Electric stoves also have more even heat distribution. This feature can allow you to monitor your cooking easier. However, they do require a power source and use electricity. They are also not as durable as their counter comparison, the gas stove.

Gas

Gas stoves are very durable. They do not need a power source where the electric ranges do. With a flame present, they are much quicker at delivering instant heat. Also, they cool down faster, which can allow you to leave food on the stove after you are done cooking without overcooking it. Plus, if you like to broil food, gas ranges are excellent at applying direct heat in partial areas. Yet, the heat distribution is most prominent wherever the flames are present. This feature can also become a setback. You must have the flame present while cooking, which can also be annoying if you have a fan going or open windows. Gas ranges are also more challenging to clean and have an uneven surface in comparison. If your home does not have a gas line present, you will need to install one to have a gas range. This can be an additional cost to consider with an already-pricier stovetop.

Ultimately, it comes down to preferences. Some people prefer the authenticity of the open flame on a gas range, while others may like the simplicity of an electric stove. Which stovetop do you prefer? Let us know below in the comment section.

The Essentials: Creating Your Spice Cabinet

Your culinary journey begins in your kitchen. The endless possibilities of foods are at your disposal with the right spices and knowledge. If you are just beginning to create your spice cabinet, there are thousands of spices to explore. However, becoming familiar with a handful of spices can go along way. Here are the top ten spices to begin with when creating your spice cabinet.

Basil

This herb is an excellent start to your spice rack or cabinet. Basil is perfect for helping to spruce up sauces or many Mediterranean cuisines. If you really want to get the full flavor of this excellent herb, you can also invest in fresh basil to keep in your refrigerator or grow your own.

Cayenne Pepper

This pepper is a Capsicum Annuum. It is typically grounded up into a fine powder to use to add spice to food. Try adding cayenne pepper to any dish you are looking to zest up the flavor.

Cilantro

Also known as Chinese parsley, this leafy herb is potent. It can give a distinct flavor to many dishes. Cilantro has a much bolder flavor than parsley. It is also great for bone and heart health, as well.

Cinnamon

Another spice you should have on hand is cinnamon. Cinnamon is made from the inner bark of Cinnamomum trees. It has been used in different cuisines for thousands of years while being a staple in many dessert dishes and pairs excellent with sugar. It also has many health benefits from anti-inflammatory properties, antioxidants and lowers blood sugar levels.

Nutmeg

Nutmeg is another great spice. It is rich in antioxidants and tastes great. Plus, it can be used in coffee or other dairy-based dishes. Typically, it is used in combination with cinnamon for holiday sweets.

Onion Powder

Onion powder is a very useful spice in the kitchen. Use this to help add the delectable flavor of onions evenly throughout an entire dish.

Oregano

Oregano is excellent to add to sauces or pizza. This herb strongly complements tomato-based dishes. It also is loaded with antioxidants and an excellent source of fiber.

Parsley

Parsley is a milder herb than cilantro. It can be used to accentuate Middle Eastern or Mediterranean cuisines. Parsley is mildly bitter yet helps lifts the natural flavors in your dish.

Rosemary

This is great for a wide variety of dishes from soups and salads or chicken and fish. Rosemary can help improve digestion and is very versatile. With its distinct lemon-pine flavor, it can easily brighten up any dish you make in the kitchen.

Vanilla Extract

Vanilla extract is essential for many baking recipes. It goes great with almost any dessert that you are looking to create. Help make a bland cake taste delicious with this powerful extract.

There are still hundreds of more spices to explore. These spices are great for kickstarting your spice cabinet and beginning your seasoning adventures. What are some of your favorite spices that we did not mention? Let us know below in the comment section!

Mother’s Day Meal

19395648_SIt’s such a nice idea. Fix mom a special breakfast in bed for Mother’s Day. Get the kids up early and make her favorite pancakes and surprise her. If you’re a mom, you may want to print this blog and leave it where your spouse or kids can see it. If you’re a dad, stop and think. Ask yourself these questions:

Have I ever made pancakes before? Sure, it doesn’t look that hard, but it’s trickier than you think. How hot do you set the pan? How thick should they be? How do you keep them warm? Where is the flour??? Next question:

Have I ever cooked with the kids before? Depending upon their ages, this could be a good idea (your 13-year-old may know where the flour is). Or it could be a very bad idea (don’t let your five-year-old measure anything – liquid or solid – unless you want some or all of it to land on the floor).

When I cook – if I ever cook – how does the kitchen look when I’m done? The sweetest mother/wife in the world will not be excited about breakfast in bed if afterwards the kitchen is a disaster.

15981311_SNow, the goal here is not to totally discourage you from a special breakfast for mom. Instead, how about adjusting your sights to match your – and your children’s – capabilities?

The simplest option is to stop at some bakery the day before and pick up some bagels, danishes, croissants, or whatever your wife likes. Buy and wash up a few berries and put some flowers on the tray. Voila, you’re finished and the kitchen looks great. Don’t forget the coffee – Starbucks if there’s one close by or homemade if you know what you’re doing.

And the kids? How about a nice hand-drawn Mother’s Day card? Check out the mom on the right. The breakfast is cereal with berries, orange juice and coffee – and the card. It’s a good breakfast and the kitchen is still looking alright. One last tip – possibly the best mom’s day gift you could give her – some extra sleep time. So hold off on that breakfast and keep the kids busy and quiet until she wakes up on her own.

Cooking with your Kids Lesson Three: Cookies

12974804_SAre you prepared for the challenge of lesson three in cooking for kids? Cookies provide a great way to get your children comfortable with measuring, mixing, and combining ingredients in the right order. However, you should probably prepare to deal with a very messy kitchen at the completion.

One approach that will help minimize the mess and confusion is a common chef approach – creating a Mise en place – which involves pre-measuring and preparing all of the ingredients. Using small bowls or cups, have your children measure every ingredient and line them up in order. In the case of cookies where the dry ingredients need to be mixed together then added to the mix of wet ingredients, you can sort the smaller containers into wet and dry sections so that it is easier to follow the directions to make the cookie dough.

For a first batch of homemade cookies, choose a simple drop cookie recipe and one that can take a beating such as oatmeal cookies. You may want to use parchment paper under the ingredients during the measuring and assembly process to limit the waste. Parchment paper also keeps cookies from sticking to a cookie sheet and makes clean-up afterwards much easier.

If you’re introducing more than one child to baking, you may want to have each child take turns with measuring and mixing. Think about making cookies that involve simple stirring rather than beating. You may want to assign the oldest to read the recipe so that everyone knows all of the steps.

You may end up finishing the baking once the first batch or two come out of the oven, but it’s worth the time and effort to watch your next generation of bakers in action.

Cooking with your Kids Lesson Two: Pizza

14452519_SOnce your children are comfortable assembling tacos, salads or other simple meals, the next step is combining ingredients to create a finished product such as pizza.

No, you don’t want your children to imitate the boy in this photo, but they can spread the dough in a pan and put on tomato sauce and toppings.

Many stores carry fresh pizza dough ready to bake. Look for one with few or no preservatives, and possibly a whole wheat crust. Once the toppings are on, most kids won’t notice the difference.

To discourage debates on toppings, have each child select one or two favorites, and make mini-pizzas so everyone gets to make his or her own round dough foundation and top it as they each choose.

As the parent, you are in charge of quality control. Pizza dough can be spread with the fingers, but keep an eye out for unintentional holes or extremely uneven surfaces. This can make one part burn before another section is done. You may also want to monitor the level of toppings, particularly the cheese.

While you want to keep an eye on the things, this is also an opportunity to let your child make a few mistakes and learn from them. Too many toppings may create a pizza that is goopier than preferred. An uneven pizza crust may not be as tasty as expected. Don’t try to make everyone’s pizza perfect; the real goal is to encourage them to have fun and appreciate the process. They can also benefit by learning from any mistakes.

Wrap up the lesson by showing them how to tell when their pizzas are properly baked. Use the light in your oven to show them how to look for bubbling in the middle and browning of the crust on the edges. Individual pizzas provide a great second phase of your cooking lessons.

Cooking with your Kids Lesson One: Assembling Tacos

15916341_SMany parents want their children to eat healthfully as well as learn the basics of making a meal. But it’s hard to figure out how or even when to start. In the midst of getting dinner ready, dealing with homework and other responsibilities, teaching your child to cook can go by the wayside. Here are a few suggestions to get started easily.

Choose simple foods your children already like. Do your kids like hot dogs or hamburgers? Perhaps they love Mexican or Italian foods. They’re much more likely to want to help make meals that they enjoy.

Focus on assembly rather than more complex tasks. Your six-year-old probably shouldn’t be handling a sharp knife, but he or she could work with already-chopped vegetables. Children can also stir bowls – though not hot pots – and add ingredients.

Start with one meal. Tacos provide a good choice for a meal that is easy to assemble and are often a general favorite. Put the various ingredients into smaller bowls with spoons or forks so that it is easy to select each item. You may want to use hard shells because they are easier to coordinate while filling.

In addition to various favorites, over time you might want to include some healthful additions such as the raw peppers shown here. Select several colors to make them more inviting.

You may find that initially your children will pile on the cheese and sneer at the vegies, but consider asking them to take at least one piece of everything available. Creating meals that involve some interaction before eating is a great way to introduce your children to the pleasures or preparing food, not just eating it.

Keep the Family Occupied Until Gift Giving Starts

15287057_SIn the hours before gift giving starts in your family, it can be difficult to keep little ones from going crazy with excitement. It’s smart to plan an activity or two to help tide them over until it’s time for presents. These suggestions may help.

Plan a pre-gift. The night before or the morning before opening presents, have one gift ready to open early. The best choice is a game, a puzzle or a couple of new movies, something that will keep everyone occupied for a few hours.

Schedule an event. A visit to a holiday light show, a family concert or even a drive to look at lights can bring the holiday into focus and take up time with restless family members. Look for holiday-themed events – there are plenty in every community at this time of year.

Bake cookies. Making a batch of sugar cookies with cookie cutters and colored frosting and decorations, followed by a cookie feast with milk can easily take up an afternoon. Also, you’re ready with cookies to leave for Santa. Have everyone choose their favorite cookie to give the jolly guy.

Stage a pajama party. With new PJs for everyone, a special DVD or two, and popcorn and favorite snacks all wrapped up in a big box to open and enjoy, you’re ready for an exciting evening that can keep everyone occupied till bedtime. Some of those cookies would be tasty here too.

Whatever you choose to do, planning the time before presents will make a much nicer holiday for everyone, particularly parents who may get tired of hearing, “Is it time yet?” every 20 minutes or so. And it gives you a chance to start some new holiday traditions with your family.