Creating a Clean House in Under an Hour

Cleaning your house does not need to take an unnecessarily long time. Set a time limit that you want to spend on each room and get it done faster and more effectively. We have compiled the perfect “Clean House List,” and we want to share it with you. This list is excellent if you are having unexpected company over and do not have time to do your usual full clean. The best part of the list is that it can all be accomplished within 45 minutes! Let’s take a look!

Room One: The Front Entrance. Time Limit: 5 minutes.

  • Straighten up all shoes and jackets.
  • Sweep or vacuum the front entrance’s flooring.

Room Two: The Living Room. Time Limit: 15 minutes.

  • Gather any items that are laying around and place them in their correct home.
  • Fold blankets and rearrange pillows.
  • Take a microfiber cloth and run it across your hard surfaces (tables and television).
  • If possible, open your window to welcome in a fresh air flow.
  • Remove all pet fur from the couches with a lint roller.

Room Three: The Kitchen. Time Limit: 15 minutes.

  • Take everything off the counters and wipe them off with a disinfectant wipe.
  • Clean up your sink area and remove any food residue.
  • Replace the old dishtowels and hang new ones.
  • Take out the trash and put a fresh bag inside the trashcan.
  • Kitchens may have an odor; light some candles to freshen the air before guest arrive.

Room Four: The Main Bathroom. Time Limit: 20 minutes.

  • Pour toilet bowl cleaner into the toilet bowl and let it sit for approximately five minutes.
  • Remove all dirty clothes and towels from the bathroom and place them into a laundry basket. Store the basket in either your bathroom closet or in your laundry room.
  • Take everything off of the countertop and begin to wipe them down with a disinfecting spray.
  • Using a sponge, scrub the inside of the sink and then use water to rinse away leftover disinfectant spray.
  • Grab some glass cleaner and spray your mirrors to remove all fingerprints and dirt.
  • Go back to your toilet and scrub out the bowl. Flush the remaining solution.
  • Take a disinfectant wipe and wipe down the toilet seat before your guests arrive.
  • Straighten the bathroom rugs and close the shower curtain.
  • Take out the trash and replace the bag.

Voila! You are done and ready to enjoy the company of your guests.

How to Hang Mason Jars

Have you ever desired to have more storage in your kitchen, but do not necessarily have the room to add more cabinets? Your solution is here: hanging mason jars underneath your cabinets adds style and function to any space. Plus, it is super simple to do! Let’s see how.

Supplies:
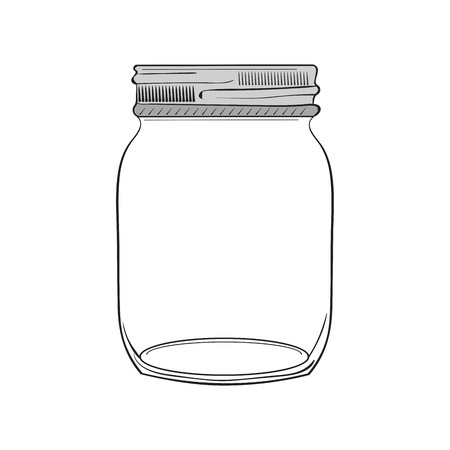
Mason Jar
Piece of Wood
Hammer
Nail
Screw
Screw Driver

Depending on the amount of space you have available under your cabinets, you can choose the number of mason jars you will use for this project.

*You will need one screw and one nail per one mason jar you use.

Want to Add Color? You can even paint the mason jars if you would like to add a pop of color. Remember to paint your mason jar before attaching them to your cabinets. If you want a distressed mason jar look, decorate the mason jar with color chalkboard paint. After it is finished drying, you can run sandpaper over the areas you want to look distressed.

How to Hang Mason Jars:

Step One. Take the lid off of your mason jar.

Note: Mason jar lids have two parts associated with them. You will have the physical “rim” and “the flat top.”

Step Two. Grab your piece of wood and set your lid onto of it. Have the lid facing up in a bowl-like resemblance.

Step Three. Take your hammer and nail and create one small hole in your lid.

Step Four. Remove the nail and lid from the piece of wood.

Step Five. Take your lid over to the cabinet that you wish to hang it underneath.

Step Six. Place your screw inside the hole you just created. Screw it into the bottom of your cabinet.

Note: It is essential that you make sure your lid is on tight because your jar will be hanging from it.

Was not that easy? It is a quick and simple way to add style and function to your kitchen or any room in your house. Try this hack anywhere in your home to add extra storage to your space. Just remember to always make sure your lid is screwed into your cabinet tight!

Seven Genius Ways to Reduce Clutter

Are you looking for ways to reduce clutter in your home? Look no further! We have gathered a list of seven ways you can eliminate unwanted clutter in your home. Let’s take a look!

Seven Ways to Reduce Clutter:

Switch to Glass Containers. Often times, our pantries are filled with plastic and cardboard containers from the store. To eliminate clutter, switch your items over to a glass jar and recycle the cardboard boxes. By eliminating boxes, you can create a clean, sleek look while providing more room.

Sort Through Shoes. Do you ever pass over certain shoes thinking that there “may” be a time that you “might” wear them? Honestly, there may never be a time because you will get better, new shoes in the future. Donate old shoes that you never wear, and free up some closet space.

Donate Old Toys. The older your children get, the more they do not want to play with certain toys. Go through the toy bin with your children to determine what toys they still use and which ones you can give to charity.

Missing Sock Pairs. We have all heard the saying that the washing machine ate my socks. Sometimes socks just disappear. Whether you left one at the gym or it is behind your dresser, you can completely start over. Get rid of all socks that you have not found the pair for in over two months. This is a good cleanse, because who does not love brand new socks?

Expired Medication. Sometimes our medicine closets hold expired medication, and we do not even realize it. Sort through all your medications to make sure they have not reached their expiration date. If they have, make sure to dispose of them safely so that pets and small children cannot get to them.

Holiday Cards. Do not get us wrong, holiday cards are very meaningful and sweet, but after the holiday season is over, you should probably recycle them. This will help free up space in your home and eliminate paper clutter. Be sure to write down any addresses in your address book before you recycle the envelopes.

Receipts. If you like to keep all your receipts, try digitizing them. Just scan them onto your computer and store them in a folder labeled “receipts.” This way they are not taking up space in your home.

Getting rid of stuff is difficult, but it is vital to happy living. You will feel a lot better once you cleanse your home.

For more expert tips and tricks, be sure to visit us at Fulton Homes. Thanks for reading!

Saving Money on a Move

You are moving into a new place. Whether you are moving into soon or in the future, moving costs are probably consuming your mind. A lot of money can go into moving into a new home from boxes to transportation. You already spent enough money on your new place, and now you have to spend more money just to get there? We understand your frustration, and we want to help you cut costs during your move to help save you money. Here are our tips for saving money on a move:

Get Rid of Stuff Beforehand. Do not bother moving stuff that you are going to sell, throw out, or get rid of eventually. Take some time to set aside items that do not need packed and donate them or throw them out.

Get Multiple Quotes from Professional Movers. Moving companies all have different prices and packages. Shop around before you set your mind on one mover. It is better to be aware of several companies’ rates before you agree on one company and make your decision.

Ask for Recommendations. Movers are moving some of your most valuable possessions; therefore, you want to make sure that they are a good company. Ask friends, family or neighbors for their moving company recommendations.

Try to Pack with What You Already Own. Think inside the box. What box-like things do you own that can hold other materials during the move? For example, if you own luggage, fill the suitcases with clothing during your move. This simple hack will save you from purchasing more boxes.

Ask The Moving Company Questions. If you decide on a moving company, ask them questions about their costs for heavy items, repacking, stairs, and their wait time. Sometimes moving companies like to hide these fees from customers. It is best for you to have an overall view of costs before you begin.

Use Portable Storage and Delivery Companies. Portable containers are perfect if you are willing to pack up the container yourself then the company will deliver it to your new place for you.

Rent a Moving Truck. If you are not interested in a moving company, rent a truck for the day and do it yourself. Ask your family or friends to help you with the moving process in exchange for a pizza dinner. Be sure to read the moving truck company’s fine print for mileage allowances and fuel surcharges before you sign your name.

Purchase Moving Insurance. Things happen, stuff breaks. If you are worried about your belongings, purchase moving insurance for more significant items.

Moving Expenses are Tax Deductibles. If you are moving at least 50 miles away, save all of your receipts from the move. The cost of packing, transporting, or storing your things can be deducted from next year’s tax return.

We hope that these tips will help save you money during your move, and we are so excited that you choose Fulton Homes as your forever home. Please do not hesitate to reach out to us with any questions.

How to Clean Your Couch

Couches are magnets to unwanted dirt, hair, and lint. Cleaning them can become an overwhelming task for homeowners. If you are curious about how to properly clean your sofa, we have the perfect guide for you! The best part is you can do this all on your own before resorting to a professional cleaning crew and here is how:

How to Clean Your Couch:

Pro-Tip: Before we begin, if you are planning on using any cleaner or solution on your sofa, it is a smart idea to apply it on a small section of your couch to see how it reacts. Try using it in an unseen place and let it sit before continuing to use it on the rest of your couch.

1. Food crumbs and dirt can be hidden underneath your couch cushions. Remove the cushions and start to vacuum up any leftovers.

2. Fabric couches are more prone to lint and hair; therefore, you want to make sure you remove all of it. Try using a dryer sheet to remove hair and grab a lint roller to get leftover lint. Bonus: the dryer sheet will leave your couch smelly fresh and delightful.

3. Each couch needs to use a particular solution type for the most successful results. You can find your couch’s cleaning needs on its fabric tag. You will notice that a letter is associated with the couch. Here is the cleaning codebook to help you find the right cleaning solution for your furniture:

S: Dry cleaned or cleaned with a water-free detergent.

O: Washed in cold water.

W: Cleaned with water-based detergent.

WS: Water-based detergent or dry cleaned.

X: Only should be cleaned by a professional.

4. Steaming your couch can help loosen up dirt and particles for a more efficient clean. Turn your iron on “steam” mode and rub it back and forth on the dirty areas. You will find it easier to clean after doing this.

5. Remember to always blot and never rub when you are trying to remove a stain. If you are looking for a stain remover, make sure to test a small area first and that it matches with your couch’s cleaning code.

We hope you enjoyed these tips for cleaning your sofa! Be sure to check back next week for more expert advice. Thanks for reading! 

Trendy Ideas for Wall Decor

Do your walls feel bare and ultimately make the room feel uninviting? It is totally okay! We have all been there. In order to master your room’s potential, you need to take advantage of that bare wall space, and we have six trendy ideas for you! Let’s take a look.

Trendy Ideas for Wall Decor:

1. Up in The Air.

If you are looking for a wall decor idea that is as functional as it is stylish, floating shelves can be the perfect choice for you. They provide additional store and the ability to display unique decor pieces on them. Plus, if you are looking for the most recent floating shelf trend, we recommend letting your shelves expand from wall to wall. This brilliant idea creates clean lines and provides an excessive amount of storage. It looks great in dining rooms, bedrooms, and living rooms.

2. Galleria.

Upon the classics, a gallery wall never goes out of style. Each year, we learn new ways to make it up more updated and trendy. This year, we recommend using the same type of frame for all of the photos. This helps to create a clean, consistent look that is absolutely breathtaking. That being said, the size can differ in each frame. 

3. Framed.

Frames are not just for pictures nowadays, but you can include things like fabric, wallpaper, graphic prints, or postcards inside of them.

4. Sketch.

Wall stencils can be a great way to add stylish detail to your walls. Plus, they are easy to do! With a paint of can and a stencil, you can completely reimagine your bare walls.

5. Jetsetter

Maps are not just for gathering directions. You can use a map as a piece of decor that displays all of the fun, unique places that you have traveled. We recommend adding colorful pins to mark the destinations that you have been. You can even add photos of you in that location near or on the place. This helps to add a personal touch to the art.

6. Found Treasures.

Antique shops are a great place to find unique treasures that can make your home a little more special. You can incorporate rustic keys in a gallery wall or hang old artwork to spice up your walls.

Do you have a trendy idea for wall decor that you would like to share with other readers? We would love to hear below in the comment section!

The Key to Storing Your Keys

We would be lost without our keys. Your keys can be an extreme asset to your life. Not only are your keys essential for transportation, but also allow access into your home, work, and even in some cases, your place of education. Where would we be without our keys? Too often people misplace or lose them due to oversight. Establishing a designated area in your home is the first proactive step in not losing your keys. We put together our top most convenient places to store your keys so that you never find yourself without them again. Let’s take a look!

Key Hook

The key hook is a phenomenal resource to facilitate storing your keys inside your home. Our team of experts has found it to be the most beneficial to place your key hook near your primary entrance and exits of your home. For example, if you exit through your foyer, your keyholder should hang closest to your foyer door. Whereas in some households, residents may exit their home via the garage. Establishing what the best location in your home is essential to keep your keys from never being lost.

Key Drawer

A key drawer has also been found to be helpful in family homes. Like anything in life, developing the habit is crucial to success.  Assign a drawer in your home where you keep all of your keys.  Make sure it is the first place you go when you come home to put your keys away.  The closer your key drawer is to your entrance and exit the better.  Not only is does this grant more convenience but also prevents you from getting caught up or distracted from putting your keys away.

Your Nightstand

So, this one may not be the closest to your door but serves a valuable second purpose.  Having your keys near your bed allows you to have instant access to your car alarm.  You would use this clever hack if you were to need quick access to your car alarm, for example, a home intrusion.  Just reach over and turn on your car alarm and you have your own home security system.  This is also probably where you are charging your phone at night making it easy to grab both before you get up and start your day.
Having your keys always in an assigned location will prevent you from losing them.  This is an easy habit to develop that can prevent a ton of unnecessary hassle and stress.  Also, creating spare keys and hiding them outside your home is an excellent preventive measure you can take to stay proactive from losing your keys or any spontaneous situation where someone else may need into your home.  For more great tips and tricks, visit us at Fulton Homes.

Professional Moving Advice for Homeowners

The word “moving” has a stressful connotation associated with it. We think of moving, and we think of the massive amount of work and preparation that will be involved. Do not let the idea of moving into a new home stress you out and keep you worried. We want to help your move be as smooth and comfortable as possible.

Tips for a Successful Move:

  • Create a schedule and checklist.
      • Schedule: To reduce stress caused by moving, create a schedule for moving day and the days leading up to it. If you plan on hiring a moving company, write down all appointments in your moving schedule. Your moving schedule will help prepare you for the big day.
      • Checklist: Certain things must be done prior to the move as well as after moving day. Create a checklist to make sure you have completed all the necessary tasks. For example, make sure all the kitchen cabinets and drawers are emptied.
  • Gather the necessary items.
        • Boxes: Boxes are a moving day necessity and can sometimes be challenging to find them for free. Excellent places to check for free boxes are grocery stores and liquor stores. You can always purchase boxes at various general merchandise stores.
        • Etcetera: Other important items to have on hand are scissors, permanent markers, masking tape, bubble wrap, trash bags, a toolbox, and cleaning supplies for last minute cleaning needs.
  • Use a color-coded box system. When you go to unpack, it can be difficult to know what box belongs in what room. To save yourself the confusion, create a color-coded box system. You will need to create a moving legend to establish which color goes with what room. After you have created the legend, place colored stickers on the box that goes with the assigned color of the room. For example, the kitchen is represented by a blue sticker on the legend; all blue sticker boxes will go into the new home’s kitchen on moving day.
  • Do not do it alone. Invite your friends and family to help with the move in exchange for a free dinner. People are usually receptive to helping out a friend in need and who wants to turn down free food? To keep dinner costs though, you can buy some pizzas for everyone to eat.

Take a deep breath before moving day. It will all be alright, and everything will get done. It is a lot of work, but moving into a new home brings new adventures. Think of the great times to come and all the memories that you and your loved ones will share. 

Best wishes, and thanks for choosing Fulton Homes

How to Prepare Your Home for Cold & Flu Season

Cold and flu season is amongst us! With kids being sent home early from school and you potentially missing work, the season can hit us fast and hard. Fortunately, there are some preventative measures that you and your family members can take. Instead of worrying about getting sick, it is time to take action and remove those unwanted germs.  To help homeowners, we created a simple guide to help you prepare for cold and flu season. Let’s take a look! 

How to Prepare for Cold & Flu Season:

  1. Buy Medicines in Advance. When you are feeling under the weather, there is nothing worse than having to go to the store to pick up medicines. For your convenience when you are ill, stock up on medication now. Buy the basics: pain relief, decongestants, antihistamines, and cough medicines.
  2. Have Supplies around Your Home. Make sure to sit out tissues and hand sanitizer around your home. Encourage your family members to use the sanitizer after they sneeze, cough or blow their nose.
  3. Wipe Everything Down. With everyone coming home from all different places, there is no way to know what germs they are bringing with them. To prevent the spreading of germs, take a disinfectant wipe and wipe down everything. Try to focus on objects that multiple people touch like door handles, television remotes, and light switches.
  4. Stay Healthy. A great way to prevent illness is to stay active and eat healthily. Encourage yourself and your family members to drink plenty of water and to get a good night’s rest. Also, you may want to talk to your family doctor about daily vitamins. Ask your doctor what vitamins your family members should be taking to help stay healthy.
  5. Wash Your Hands. Out of habit, we may not wash our hands as long as we probably should. Washing your hands can genuinely help prevent the spread of germs. To stop germs in their track, make sure that you wash your hands for a full twenty seconds. According to The Center for Disease Control, you want to make sure that you get between your fingers and under your fingernails by scrubbing for twenty seconds.

Remember to keep your floors clean and free of dirt and dust. For carpet and wood floors, be sure to vacuum/sweep daily regularly. Removing those unwanted particles can help promote a happy and healthy home. Thanks for reading!

How to Organize a Kid’s Room Like a Pro

Let’s be honest; a child’s bedroom and playroom are not the most organized room in the house. They tend to get messy, fast. But fear not, there are ways to avoid the messiness and focus on maximizing the room’s organizational potential. For tips on how to organize your kid’s bedroom like a professional, keep on reading! 

How to Organize a Kid’s Room Like a Professional:

Tip #1: Hide-and-Seek.

Hide-and-Seek is not only a kid’s game, but it can come in handy when organizing your child’s bedroom. You want to “hide” the toys and only “seek” them when it is playtime. A great way to hide the toys is by putting them in plain sight. Fun animal-themed baskets and decked out treasure chests will do just the trick. If you are blessed with a closet in the bedroom, you can replace the closet door with a curtain. The curtain will provide a little more leeway for extra room. You can also place a dresser inside of the closet and use it for extra storage. For your kid’s more attractive toys, like toy firetrucks or dolls, you can place them on a shelf to be displayed. By utilizing toys for decor, you keep them off the floor while adding to the overall design. 

Tip #2: Get Hooked.

Wall hooks are a fantastic storage technique. They provide a place for winter jackets or dress-up costumes. Whatever your use may be, consider using hooks in your child’s bedroom for storage. Plus, you can buy wall hooks to fit the style of your kid’s bedroom and help add to the overall design. 

Tip #3: Labeled.

Label your child’s items to help them during the cleaning process. Bins and drawers can have small, clear labels placed on them for reference. By doing this, you can help your child take responsibility of their room.

Tip #4: Where Monsters Go.

The space underneath your child’s bed is the perfect place to store items you do not use frequently. Out-of-season clothing or underused toys can be placed underneath the bed. Be sure to buy roll-out bins for easy access.

Tip #5: Double-Duty.

Wherever you can add extra storage, do it. You can purchase cubed chairs that are hollow on the inside of them, and use this empty space to store your kid’s reading books and coloring items. Plus, they can use the cube chairs for tea parties or storytime. It is dual-purpose and twice the fun. 

We hope you enjoyed these tips and tricks. If you are looking for more expert advice, please check out our blog hug. Thanks for reading!