How to Properly Clean Your Walls

Most homeowners know the essential cleaning areas. They clean their floors, counters, and windows, but did you know that you should wash your walls? Walls can easily attract unwanted dirt, debris, and fingerprints. Your furniture can even leave unattractive scuffs and marks on your walls, but there is no need to fret because we have the ultimate cleaning solution for you. Let’s take a look!

Supplies:

  • Canvas Drop Cloths/Old Sheets
  • Old Sponges
  • Lamb’s Wool Duster
  • White Rags
  • Dye-Free Sponge
  • Two buckets

Preparation:

Move the room’s furniture into the center of the room. Place canvas drop cloths or any old bedding sheets on the floor. Before we begin, place an old sponge over any nails in the room. The sponge will remind you where your nails are and help ensure safety while cleaning the wall. Put on your rubber gloves and fill your two buckets. Fill one with cleaning solution and the other with hot water.

DIY Cleaning Solution Mixture:

Depending on your stain, the cleaning solution can vary. For mild to regular wall stains, mix together one gallon of warm water with two tablespoons of natural dish detergent. For heavy wall stains, mix together one gallon of water, one cup of non-sudsy ammonia, one cup of white vinegar, and one cup of borax.

Step One:

Remove all dust from the walls with a lamb’s wool duster. Clean off your duster outside to assure all dust leaves the room.

Step Two:

Begin washing the walls by dipping your sponge into your cleaning solution. To avoid dripping, work from the bottom of the wall to the top of the wall. Gently clean small sections of the walls with the sponge. After each section, rinse the wall with the hot water from your other bucket.

Step Three:

Take your white rags and tap them against the wall to remove any remaining moisture.

Note: Do not take breaks while working on one wall, because it may cause wash marks. Only take breaks in between working on walls.

These tips apply to standard painted walls and help homeowners clean without using harsh chemicals. Test one area of your wall before beginning treatment.

Tips for Cleaning Your Kid’s Toys

Your kid’s toys and playsets need to be cleaned consistently to avoid potentially spreading germs and other illnesses. A lot of cleaners contain chemicals that can be just as harmful to children’s health as germs. You can avoid using harsh chemicals on your child’s toys by making an all-natural cleaner. Below, we listed ingredients for our favorite all-natural cleaner. Let’s take a look!

All-Natural Cleaner Supply List:

  • Glass Spray Bottle
  • Distilled White Vinegar
  • Water
  • Lemon Essential Oil

How to Make an All-Natural Cleaner:

Combine one cup of white vinegar with one cup of hot water into a glass spray bottle. Add in six refreshing drops of the lemon scented essential oil. This combination is safe and effective in cleaning your children’s toys. Plus, it can also be used on your child’s playground or indoor playset.

How to Clean an Outdoor Playground:

  • Step One. Using a broom, clear off any dirt or debris that is currently on the playground.
  • Step Two. Take your garden hose and spray off any remaining dirt that may be stuck. Note: You may want to use a high-powered spray nozzle for this step.
  • Step Three. Spray your all-natural cleaner on the playground and wipe it off with a soft and fluffy rag.
  • Step Four. Repeat these steps at least once a month.

Dirty and Clean Toy Boxes:

Experts recommend that you have two toys bins, one for clean toys and one for dirty toys. Anytime a toy becomes dirty, and you do not have the time to clean it right away, place it inside of the dirty toy bin. Note: the dirty toy bin should be out of reach from your children. You should try to clean your children’s toys at least once a week.

Green Cleaning:

The United States Environmental Protection Agency encourages the use of green cleaning and disinfectants for your child’s overall health and well-being. Remember always to encourage your children to wash their hands often in order to prevent the spread of germs.

A healthy life starts with awareness and action. If you feel like you need to clean one of their toys, it is better to be safe than sorry. Try to clean toys that they frequently stick in their mouths or ones that have been used by other children.

Five Things That Make Your House Look Messy When It Is Clean

The dishes have been washed, the floors are mopped, and all the kid’s toys have been put away in their proper place, but it seems like no matter how much you tidy up, your home it still looks chaotic. You would be surprised by how small clutter, technology, and a host of other factors can make your house look messy even when you have undergone a deep cleaning. To help, here are some ordinary things that can be affecting the overall aesthetics of your home’s interior:

Tangled Wires

The fifty-inch television in the living room that is probably your pride and joy could be the very thing that is making your house look untidy. Get creative and find a way to mask tangled wires and plugs. Free your walls of HDMI cords as well as cords from the DVD player. Keeping such wires exposed can look tacky and takes away from the room’s decor.

Left-Over Laundry

Are you still trying to find time to fold and put away last week’s laundry? Try to find a place other than the corner of your bedroom or the living room to store clean laundry. There is no doubt that it takes away from the interior. All you have to do is find some time to put things away in their proper place.

Cluttered Countertops

Do you own enough beauty products in the bathroom to stock aisles? Find a way to remove as many products from your counters, and try finding other areas in the home where you can store some products. You can even find new creative ways to create additional under the sink storage. This same method should also be applied when it comes to clearing your kitchen countertops. Getting rid the clutter on your countertops will result in a crisp, clean and streamlined look.

Unmade Bed

We have been told since childhood to make sure the bed was made. Somehow that concept goes out the window on those rushed mornings. Making your bed every day will instantly make things look neat, but it also creates the perfect opportunity to show off your stylish bedding.

Messy Entryway

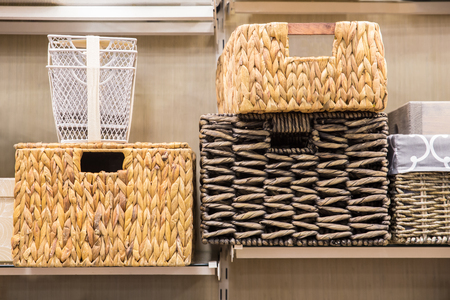
Is your entryway littered with coats and shoes blocking the doorway? Use storage bins to make space for your bookbags, shoes, and jackets. You can even install additional hooks to hang your belongings and remove them from the floors.

When you begin to see clutter overtaking your home, it can be the perfect chance to tidy up and make your place look brand new. We recommend focusing on these five areas to help make your place sparkling. For more expert tips and tricks, be sure to visit us weekly at Fulton Homes. Thanks for reading!

Tips for Tackling Your Daily Household Chores

With the high demands everyday life, household chores can become quite a daunting task. We dedicate all our time to work, family, friends, events, and even our physical health that it can seem overwhelming to set aside time for chores. Unfortunately, the longer you procrastinate your daily housework, the more encumbering the task becomes. To help, we put together five general rules that you should establish in your own space to prevent your chores from piling up on you. Developing these tricks in your daily life can help keep your home looking clean and well-kept. Let’s take a look!

One-Touch-Method

The one-touch-method is a great trick to start using in your own space. It is a general rule of thumb that declares, when you return home, you can only touch your belongings one time. For example, do not just come into your home place your mail and your coats in a temporary spot that you will “get to later.” Everything must be sorted and placed away at time of arrival in your home. It will help ensure a cleaner space and prevent clutter from accumulating.

Empty Countertops

If you struggle with clutter or chores building up in your home, you should try to keep your countertops always clear of everything. Do not allow anything on your countertops. Everything should have a designated place in a drawer or cabinet. It makes it very easy to identify items on your counter space. This minimalist approach may take a couple of extra seconds to put away coffee makers or blenders, but it prevents chores from accumulating throughout the week.

Everything Belongs Somewhere

This brings us to our next great trick: everything in your home should have a designated place of residency. Your cleaning supplies, your books, your tools, even your shoes should all have a place they are continually stored. This will make it easier to find your belongings and take care of chores as they come throughout the day. When you are done with an item, return it to its assigned location.

Laundry and Dishes

Here are two chores that will never go away: laundry and dishes. With dishes, try to clean as you cook. Do not allow downtime in the kitchen while food is boiling or in the oven. It can be an easy way to help prevent the buildup in the sink. When you are done eating, account for cleanup time as well. You can also wash your clothes every night or establish a laundry day for later in the week.

Try to tackle a few of your chores every day to prevent them from accumulating. Tasks can quickly become overwhelming, but with a little time management, they can become less daunting. Remember to establish days in your week to work on more significant projects in your chore list. For more great tips, make sure to subscribe!

Genius Cleaning Hacks for Pet Owners

Owning a pet can be one of the most exciting adventures in life. While pets bring us a lot of joy, we want to make sure that we keep them happy and healthy. To ensure your home is pet-friendly, we have created six cleaning tricks that every pet owner should know. Let us take a look!

The Dishwasher Trick

Just like people, your pet’s items need to be cleaned regularly. There can be a lot of germs and unwanted build-up on their toys and food dish. To help make sure they are happy and healthy, you will want to wash their items regularly. An easy and efficient way to do so is by using your dishwasher! Just place their plastic and rubber toys inside of the dishwasher with one tablespoon of baking soda. Let the dishwasher run a cycle and voila, they have clean toys in no time! Just let the toys dry off then you can place them back in their proper home.

The Squeegee Trick

Pets are amazing, but their hair…Not so much. To eliminate their hair from your rugs, you can run a squeegee over top of them. This works best for non-fluffy rugs, and you want to be aware that being too harsh could damage the fibers.

**We recommend always consulting the manufacturer’s website before attempting.

The Litter Pan Trick

Is your cat litter getting everywhere? Try placing a baking pan outside of the litter box. Line the pan with contact paper and remove the leftover litter frequently.

The Room Deodorizer Trick

Chemicals are not good for your pets; therefore, we recommend creating your own natural deodorizer. In a spray bottle, you will want to add 1/2 cup of warm water, two tablespoons of baking soda and 1/2 cup of vinegar. Afterward, you can add a pet-friendly essential oil like peppermint to help create a refreshing scent. Spray the mixture and let it sit for a couple of hours then vacuum as needed.

**Peppermint essential oil is safe in small doses. Please consult your veterinary before using any essential oils near your pets.

The Dog Bed Trick

Just like our beds, dog beds need to be washed. For a quick clean, place your dog bed cover in the washing machine for a cycle.

The Brushing Trick

If the weather permits, always brush your pet’s hair outside. This will help ensure no dog hair gets traced into the home and helps avoid future cleaning.

We hope you enjoyed these tips and tricks. Check back weekly for more blogs and updates.

Operation Organization in Ten Minutes

When we think of undergoing an organization project in our home, we think of it as a daunting, long task that will take up a lot of our day. While organizing areas in our house, the mere thought of beginning these tasks can influence us to procrastinate. However, what if you could organize areas in your home in only ten minutes We all have ten minutes in our day to spare. While this may seem too good to be true, you would be amazed at how much you are able to accomplish in your home in just ten minutes. Now, you will need to stay focused and keep moving, but with our Ten Minute checklist, you can quickly get your rooms reorganized. Here is our Ten Minute Checklist to help you reorganize areas in your own home:

Break Larger Projects into Smaller Tasks

Some tasks can be very overwhelming at first. Maybe you want to organize your bathroom, clean a closet, or declutter your garage. These larger tasks can take time. Try to look at areas then break them into smaller projects. For example, maybe you have been procrastinating organizing your bathroom for some time. You have clutter drawers, unfolded towels, and toiletries that have no designated homes. Instead of tackling everything at once and deep cleaning the room, try to find a more obtainable task. Tell yourself you are going to organize one drawer every day. Using this simple tactic is a great way to start making some serious headway on big projects.

Declutter

When you find the task that you are going to accomplish, start by decluttering. A cluttered drawer or closet can visually be overwhelming. Pull everything out of the space you are working on cleaning. By spreading the mess, you can quickly identify what goes where. Since clutter is one of the main visual intimidations that prevent us from starting a task, you can begin by decluttering the area that you are more likely to accomplish.

Trash/Donate

Once everything is pulled out, decide what trash is and what will stay. By eliminating items and belongings that were once cluttering the area, you will be able to put the area back together into a more organized look. Decide if any things are no longer of value to you. Maybe they are still valuable and worth donating to others. Some items may just blatantly be in the wrong spot in your home.

Organize

Lastly, with your time remaining, put everything back into your drawer. Using bins or baskets is an easy way to organize belongings. Return everything to the original spot in a more focused and organized manner. You will be surprised what some focus and ten minutes can accomplish!

Do you have areas in your home that demand attention Try this organization checklist to help get you started. You will be amazed at what you are able to get done in ten minutes. For more great tips, visit us at Fulton Homes.

The Ultimate Bedroom Cleaning List

Bedrooms should be cleaned often because of the amount of dust, dirt, and allergens that can become easily trapped in your space. Try to clean your home’s bedrooms once a week to help remove any unwanted dirt and dust. Before you begin, open the room’s windows to give the room fresh air and a nice air flow.

Clothes

Take all your dirty clothes to the laundry room and place all clean clothes in their proper place.

  • Every season, you should move the current season’s clothing to the front of the closet then move last season’s clothes to the back of the closet. For example, it is currently February; therefore, you would move your winter clothing to the back of the closet and bring your spring clothing to the front of the closet.

Flooring

Vacuum your bedroom floors to collect any dust and dirt that may have been tracked into the room. If you have hardwood floors, you should mop your floors with a basic floor cleaner.

  • You can make your own floor cleaner by mixing together 2 cups of hot water with 2 cups of white vinegar in a bucket. This floor cleaner will dry on its own; there is no need to rinse.

Mattress

Undress your mattress and put all the linens into the washing machine. While your bed is undressed, lightly sprinkle baking soda on top of the mattress and let it sit. After your linens are washed and dried, vacuum the mattress to remove any excess baking soda.

Bedding

Now, redress your bed with your clean bedding and linens.

Windows

Take window cleaner and clean your windows off in a circular motion. If you have window ledges, remember to remove any dust that may be on the ledge. Every six months, take your curtains and put them into the washing machine. Dust can build up on your curtains, and it is essential to make sure that they are cleaned.

Dusting

Take a feather duster and go over your ceiling fan, blinds, picture frames, furniture, etc.

Candles

Close your windows then light your favorite candle to freshen up the bedroom as a final finishing touch.

With a fresh and clean bedroom, you can relax and enjoy your clean oasis. We hope you enjoyed these tips and tricks! For more advice, be sure to subscribe.

How to Deep Clean Your Bedroom

Deep cleaning any area in your home feels rejuvenating and gives you a great sense of pride in your home. Sometimes we have our weekly cleaning chores but do not have deeper cleaning plans than those. Deep cleaning will take you beyond your regular cleaning chores and help you accomplish more. We put together a basic checklist to follow to help you deep clean your bedroom. You can always do more, but these tips are a great place to start.

Wash Your Sheets and Comforter

A perfect place to start is by stripping the bed. Washing your duvet, comforter, sheets, and pillowcases can take some time, so this is a great place to start with the deep clean. While they wash and dry for the next couple of hours, you will have time to work on deep cleaning your room.

Dusting

Next, dust everything off in your room. Remove decor, television stands, lamps, or anything obtrusive from fully dusting every surface thoroughly. After everything is thoroughly dusting, go back with the appropriate cleaners for each surface areas and clean them. Do not forget to get baseboard, on top of the fan, and window sills. These areas are rarely dusted and can collect a plethora of allergens.

The Floors

After your dusting has been completed, it is time to clean the floors. For carpet, simply vacuum. For laminate, hardwood, or tile floor, you can start by shop-vacuuming the area. Get into corners thoroughly to make sure you remove all dirt and dust. After the floor has been swept, apply the appropriate floor clean to your floor. Not only will this deep clean your floors, but most cleaners will leave your room smelling fresh as well!

Drawers and Closets

A lot of drawers and closets go unattended for deep cleaning for long periods of time. You should try to create three separate piles or boxes when cleaning. Make a giveaway pile of clothing and items you no longer need in your life. The next pile should be items that do not necessarily belong back in the closet or drawers. Lastly, make the pile of clothing and items returning to the drawers and closet space. This can keep you organized during your cleaning process. Break walk-in closet or dressers into a smaller less overwhelming task.

Organize Everything

Make sure everything you put back has a sense of organization. You do not want to spend a day on a project to have it feeling unfinished when you are done. Take breaks and treat these tasks as a checklist to make it feel less overwhelming. Once you are done you will feel a huge sense of accomplishment in your space.

Tips for Developing a Realistic Cleaning Schedule

Do the dishes seem to be piling up lately? Or maybe you have neglected dusting the past couple of weeks. While it is essential to keep a clean house, with a hectic schedule, it can be a challenge to clean your entire home adequately. Well, we have got you covered. Below are some helpful tips to ensure that your house gets thoroughly cleaned:

Schedule It

It is just that simple. Perhaps, the most reliable way to ensure that you clean your home is to put it on your calendar and stick to it. Making a home cleaning schedule for your entire house is important because it makes you feel less stressed and more likely to carry out the assignment. Pencil in an area of the home that you plan on attacking during the week. The key to making sure this method is successful is to create a realistic cleaning schedule. So if you know that you have to work an extra shift on Tuesday, it would not be wise to schedule a hefty cleaning project for that night.

Take Inventory

The only way you can create a realistic cleaning schedule is to take inventory of what exactly needs your attention in your home. Do the closets need to be decluttered? Or maybe you need to dust and clear off the bookshelf. Grab a pen and paper, and walk around your home to determine what needs cleaning.

List The Rooms

What rooms require regular cleaning? Areas of the home like the kitchen, bathroom, and your bedroom probably need frequent cleaning when compared to other rooms in the house. These rooms are used more often. Leave the other areas in the house that you do not occupy as frequently such as the guest bedroom or maybe a formal living room off of your cleaning schedule.  You can implement them in seasonally or when you are expecting to have guests.

Trial Run

Take your cleaning schedule for a trial run by trying your best to stick to it for a month straight.  Limit the time you spend cleaning each area so that you do not overwhelm yourself.

For more great tips and tricks, check out our blog hub at Fulton Homes.


Five Unhealthy Mistakes You May Be Making

We can all agree that our family’s health and well-being is important to us. With so many misleading articles out there, it is easy to get confused or deterred from healthy habits. To ensure your family stays healthy this winter, you will want to avoid these six unhealthy mistakes that you may be making:

Mistake #1: Not Changing Your Filters. From the vacuum filter to air vent filters, replacing filters can be an essential part of healthy living. Changing these filters can help reduce the amount of dust and dirt particles we breathe in the air.

          • Experts recommend changing your air vent filters every three months and your vacuum filters every six months.

Mistake #2: Taking off Your Shoes Indoors. A lot of families make the mistake of removing their shoes inside their house, but this can be potentially dangerous. If you suffer from allergies, you are possibly bringing in your allergens from outside. Not to mention, you are bringing in dirt, debris, and other unwanted particles. Be sure to remove your shoes outdoors or place them in a shoe tray right by the main entrance.

          • If you decide to use a shoe tray, be sure to wash and clean it at least once a month.
          • Also, we recommend storing indoor shoes, slippers, or socks near your entrance to slide on after you enter your house.

Mistake #3: Letting Trash Can Overflow. Trash can be an unsanitary, unhealthy build-up of an array of items. Be sure to empty your trash cans often to avoid unwanted pests.

Mistake #4: Setting Your Thermostat Too High. Dust mites and mold are prone to living in warm climates; therefore, we recommend keeping your thermostat at 70 degrees. This middle temperature will help discourage these unwanted factors to develop.

Mistake #5: Not Using Exhaust Fans. From your kitchen to your bathrooms, it is imperative to use your exhaust fans. They help reduce mold and moisture build-up.

We wish you and your family a safe and healthy season. Let us know how you keep your home happy and healthy in the comment section!