Bad Cleaning Habits You Must Break

Cleaning our homes regularly is a great way to take pride in our space and self-care. We can get rid of dust and pollutants and make our homes an overall healthier atmosphere. However, sometimes we take short cuts or just do not have the proper techniques with cleaning. While cleaning your home is essential, bad habits can create more issues later. Here are four bad cleaning habits you need to break:

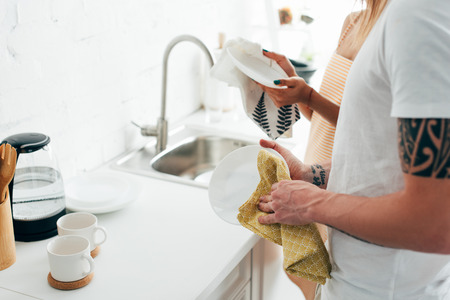
Not Cleaning Your Cleaning Tools After Each Use

We clean our homes and then put our dirty tools. The mops, the brooms, scrub brushes, sponges, and more all fall victim to this bad habit. To ensure you are not adding to the dirt next time, schedule when you will clean your tools. You can do it before or after each use. The best habit is to clean them after each use – this can ensure that they do not mold or build nuisance dust over time in storage.

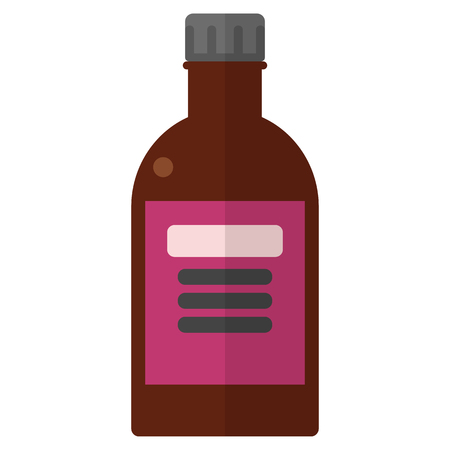
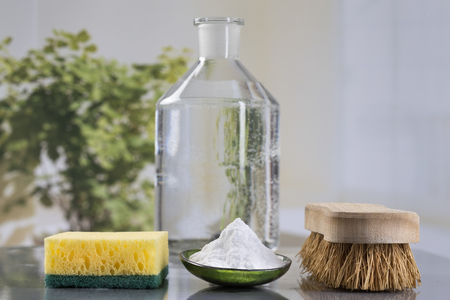
Using the Wrong Cleaners for Different Applications

Multi-surface cleaners are great; however, not everything is a multi-surface cleaner. Using the proper cleaner for the right task is essential. Some oil-based products can damage woods or smear on glass. Make sure you are using the right cleaners for each application.

Using the Same Disinfectant Wipe Throughout a Room

Disinfectant wipes can kill 99.99% of germs. They are great for cleaning bathrooms, bedrooms, kitchens, and more. Yet, do not keep the habit of not throwing away each disinfectant wipe. It is unsanitary to wipe your toilet then wipe the sink where you sit your toothbrush. The best rule of thumb is to use a new wipe for each surface!

Leaving out Wet Towels

Stop leaving wet towels lying around on the floor. When you use a towel, and it gets wet, it can become a home for mold to form. Remember to schedule days to wash your towels and rags around your home at least once a week!

Cleaning your home is a great habit! It keeps your house clean and can prevent sickness. Just make sure you are not developing any bad habits. Be smart about how you clean in order to be efficient. For more insight on home cleaning tricks and tips, make sure to subscribe.

Tips for Pressure Washing Your Home

Whether your home is older or just becoming dirty on the outside, there is no more convenient or cost-effective way to clean the siding of your home than a pressure washer. It can easily blast away mildew, dirt, and muck that would take hours to remove by hand. If you are new to the concept, here is what you should know:

Safety

When pressure washing your home, make sure your siding can handle it. Concrete, vinyl, brick, and stone are all capable of handling a strong pressure washer (even stucco with the proper procedure). If your house has been painted, be cognitive that no lead was used in the paint. This can release harmful vapor you can breathe. Inspect your home for any areas that will need special attention. Remember, do not pressure wash your windows; they will break! Also, you should wear a pair of safety gloves and safety goggles at all time. The high-pressure water is strong enough to literally cut you! It is important to be aware of its power at all times and remember to stay safe.

What Is a Pressure Washer?

Your typical garden hose has an average of 35 psi. PSI is a measurement of Pounds Per Square Inch. A pressure washer will hook up to your house and amplify that tremendously. Some pressure washer will range from 1500-3500 PSI, but you can find some in a wide variety of ranges. Pressure washers can come electric, cordless, or gas-powered. The stronger the PSI, the more heavy-duty grime you will be able to remove.

Setting up Your Pressure Washer

Attach your garden hose and turn on the water. Your pressure washer will have an inlet and an outlet hose. Then hook up your outlet house with your high-power hose. You can select different tips to place at the end of your hose. Most pressure washers will have a wand which can allow you to control turning on and off the sprayer easily. Find out which tip is best for your project. Some pressure washers can be powerful enough to tear right through your siding. Test a discrete area to see which tip is best for the job.

Stucco Specifics

Since we are in Arizona, stucco is the most popular siding option in our area. To make sure you properly use your power washer on your stucco siding, you will want to be cognitive of the following: 

  • First, you should look for chips or cracks in the stucco. You do this because water can come in through those areas. If there is a crack or chip, it will need to be filled before beginning. 
  • Next, you will want to spray the pressure washer in sections. Each section should be completely rinsed, have detergent applied, and completely rinsed again before moving onto your next section.
  • Additionally, while you apply the detergent, you should water the area to soak up some of the excess detergent on your stucco walls.
  • Lastly, you will want a 20-degree nozzle for a standard surface. With your intense stains, place a rotating scrub brush on the hose. 

Since stucco differs from other siding options, ask your pressure washer sales associates for a complete run-down before renting or even purchasing the pressure washer. This will ensure you fully understand its power and capabilities.

Pressure washing your home is an effective way to get rid of dirt and grime. Be very careful when using a high PSI pressure washer. Do not use this on windows or on your car because it can damage them. For more insight on exterior cleaning, make sure to subscribe.

What Are the Dirtiest Areas of Your Home?

The truth is, no matter how often you clean your home; there is bound to be dirt in every corner and sometimes even in unexpected spots. In fact, according to the Society for General Microbiology, germs and bacteria can divide every twenty minutes in the right environment and climate. A study conducted by the group revealed that there were over 300 different types of bacteria that were found on just thirty diverse objects. That being said, you may be interested in what are the dirtiest areas of your home. Today, we are going to take a look at them and how you can keep them clean. Let’s get started!

Kitchen 

Many studies have found that the kitchen is the dirtiest area of the home. Areas, where the food is prepared or stored, can have more bacteria and fecal matter contamination than the bathroom. You will even find that the dish sponge or cloth is heavily contaminated. Other items in the kitchen that are susceptible to contamination include: 

  • The coffee maker 
  • Kitchen countertops 
  • Refrigerator 

Cleaning Routine: You can try and keep the kitchen germ-free, especially when you are gearing up to prepare a meal. You can do so by using disinfectant wipes on all the surfaces in the kitchen, including the countertops, faucet, and refrigerator. Additionally, before washing your dishes with the sponge or washcloth, you can place it in the microwave to kill off the bacteria. You can even soak it in a warm, bleach water and throw it in the washing machine. Remember to switch out dish towels at least once a week.

Door Handles and Switches

You cannot forget about the doorknobs and switches since these are the least obvious place for germs in the house. While you would think the bathroom knob would be the dirtiest of them all, it is actually spots on the door that are much higher. Some areas that ranked high with bacteria is :

  • Refrigerator handle
  • Stove knobs
  • Microwave handles

Cleaning Routine: Try cleaning these spots with a disinfectant spray every day.

Laundry

Did you know that leaving your laundry in the washing machine for a little bit of time can cause germs to fester?

Cleaning Routine: It is important to remove your clothing articles from the washing machine once they are done and place them in the dryer or hang them to dry.

Were you surprised by any of the listed items? Is there anything that you make sure to clean that you think we missed? If so, be sure to leave us a message in the comment section.

Six Cleaning Habits You Need to Stop

We all love a clean house. That being said, sometimes, your cleaning habits can be doing more harm than good. Believe it or not, we are all guilty of some type of lousy cleaning habit. Before you break out your gloves and bring out the duster, here are some common cleaning mistakes that you are probably about to make:

Failing to Read the Directions

So you have tried an expert-recommended product, but it did not work the way you thought it would. While it is possible that the product is not as great as they said, it is more likely that you just did not use it properly. Many people often fail to read the cleaning directions on products before using it, and manufacturers do their best to create quality products that will actually produce results. Before giving up on the product, you should carefully read the label for directions before using it.

Harsh Cleaning Products

Trying to get a stain out of your carpet? Or maybe you are trying to bring some life back into your furniture? Whichever the case, the answer is not always the harshest or strongest cleaning product. In fact, most jobs only require a gentle pH cleanser to adequately clean. Only break out the big guns when the gentler products do not work.

Using too much Product

Have you ever heard of the saying: too much of a good thing is never good? Only use the recommended amount of a cleaning product or else you may spend more time cleaning up excess product than actually cleaning the surface. In addition, you do not want to throw away your hard-earned money by wasting the product; therefore, less is always more.

Water on Your Hardwood Floors

Of course, your hardwood floors need to be mopped, but saturating your hardwood floors with water can ruin the finish. Make sure that you are always cautious when mixing water and wood.

Bleach as a Cleaning Product

Bleach should not be confused with a cleaning product. Bleach should be used for disinfecting and whitening; therefore, when it comes to cleaning up dirt and soil, you will have to use a real cleaning product. Save the bleach for your white laundry.

Multi-Tasking

Trying to do two things at once may make you feel like your getting things done faster, but you may be only prolonging the process. Focus on cleaning one area at a time to be effective.

Do you make any of these common mistakes? If so, you are not alone! The first course of action is to be aware then make a change.

Tips for Cleaning Your Closet

Closets can easily become the melting pot of clutter in our homes. From clothes to storage, these spaces can quickly get out of hand. They are convenient because they are out of sight, out of mind. However, they can become a nightmare if they go unattended for too long. Cleaning out your closet can be a daunting task that is easily procrastinated. However, with a little bit of time and effort, you can once again have your closet feeling functional. Here are the steps you need to get your closet back to normal:

Remove Everything 

Starting the project is the hardest part. By removing everything from your closet, you are in too deep. If you know the project needs to be broken into several days, make categories of what you will remove and when. You can start from the ground up or start with clothes. Just be sure to pull clothes you want to donate, and use large boxes or trash bags to help sort them. You can even pull seasonal clothes from your closet to separate as well. Remember that finding everything in your closet, “a home” can take time.  

Donate 

While cleaning your closet, you will find that it is the perfect time to donate. Create three piles: one to donate, one to keep, and one undecided. Only put back your ones to keep. If you need to grab anything from your undecided pile in the next year, you needed it. If you never think about it again, you can donate it. These are easy tricks minimalist use to help eliminate clutter.

Manage 

You may want to make some small investments in storage management. Buy shoe organizers and storage shelves for your closet. You can buy bins and baskets to help keep your closet organized. When putting your clothes back into your closet, have a purpose. Sort them by casual and formal. Giving your closet a sense of organization can help you manage and keep the space clean longer. 

The closet can be intimidating to clean, but worth the time invested. These simple tactics can go a long way. Stop letting your closet manage your life and learn to manage the mess. For more tips and tricks on cleaning, make sure to subscribe.

Let’s Clean the Kitchen in Under 20 Minutes

We know everyone is busy with work, kids and finding the time just to straighten up, much less clean. Many of us do not have the luxury of a housekeeper, so we tend to prioritize our tasks, and generally, housecleaning is not on the top of that list. After a little thought and consideration, we have developed a process for cleaning the most important room in the house, the kitchen, in under 20 minutes!

Start by looking around the kitchen and picking up things like the newspaper, shoes, etc. and place them where they belong. Clean off your countertops and get out your cleaning supplies. | 3 minutes

Dust with microfiber cloths and dust from the top down, so that the dust falls to the floor and is not left on top of cabinets, etc. | 2 minutes

Check the fridge and throw out any and all items that are old and expired. Take your cleaning cloth with cleanser and wipe the fridge and freezer inside and out starting at the top and go down to the bottom. | 3 minutes

Dirty dishes. . .did you know that you burn less energy by running the dishwasher when it is full than by hand washing a sink full of dishes here and there? So load up that dishwasher and give it a spin! | 1 minute

Now you have dusted, cleaned the dishes and fridge, take your cleaning cloth and cleanser and clean the countertops, stovetop, and microwave. | 3 minutes

Start vacuuming the floor and baseboards. Do you have a small rug, give it a shake outside. If you have a cordless vacuum, this saves precious minutes by not dealing with tangled cords! | 3 minutes

Now put everything back in its place while putting up away all of your cleaning tools! | 2 minutes

Sit down and take a breather as you gaze over you sparkling clean kitchen! | 2 minutes

We hope you enjoy our tips and would love to hear your ideas on cleaning!

Secret Household Cleaners: Hydrogen Peroxide

Hydrogen peroxide is a household antiseptic. Generally, when you think of hydrogen peroxide, you would probably consider it as a first aid product; however, hydrogen peroxide is more than just a first aid cleaning product. This oxidizer is an incredible bleaching agent and disinfectant. If you have a bottle of hydrogen peroxide, you may have more household uses for it than you realize. Here are three secret household cleaning tips for hydrogen peroxide:

Excellent Grout Cleaner

Grout is porous and can stain easily and be difficult to clean after the sealer wears. Simply, mix baking soda and hydrogen peroxide to create a paste. Use two-parts baking soda and one-part hydrogen peroxide and take a toothbrush to scrub the grout lines. Allow it to sit for a couple of minutes then remove the paste with a wet rag. You may need to add a lot of water on your rag to help clean up some of the gritty soot left behind from the paste.

Perfect Toilet Bowl Cleaner

We use hydrogen peroxide as a disinfectant agent because of how well it works at killing unwanted bacteria. Add a cup or two to your toilet bowl and use a toilet brush to scrub around the hydrogen peroxide. This bleaching product will help break down unwanted residue and bring back your natural white porcelain. Allow the product to sit for an hour to fully work its magic. After, simply just flush your toilet.

Alternative Laundry Bleach Agent

Hydrogen peroxide is an excellent bleaching agent. The unstable peroxide bond is responsible for the oxidation. When you are washing your clothes, consider adding hydrogen peroxide into the bleach compartment of the machine-this is environmentally-friendly and a great alternative. It will break down the chemical protein bonds and leave your clothes looking brighter and cleaner than ever!

Hydrogen Peroxide has many everyday household uses. If you have hydrogen peroxide in your home, consider using it for its many added benefits. From killing germs to an excellent cleaning product, hydrogen peroxide is more beneficial than just being in your medicine cabinet. For more insight on other secret household cleaners, make sure to subscribe!

Secret Household Cleaners: Vinegar & Baking Soda

You may not need to invest in some harsh cleaning chemicals to remove stains in your home. Vinegar and baking soda are as great of a combination as salt and pepper. Maybe not on your food, but still in the kitchen. Actually, throughout the whole home! Vinegar and baking soda create a fantastic paste which can be an all-natural remedy cleaning product. The perfect homogenous blend of acid and base-both work together to remove and clean the worst stains. Here are some simple ways to use this combo in your own home:

Fantastic Stainless Steel Cleaner

Stainless-steel is beautiful; however, it can get greasy easily and lose that luster it once had. Make your stainless-steel look new again with your homemade baking soda and vinegar cleaner. This bubbly concoction works great at restoring stainless steel.

Remarkable Carpet Stain Remover

Carpet is a substantial home investment, so we never want it to wear or stain early. When wine or urine penetrates carpet, it can be challenging to remove; however, vinegar and baking soda are perfect for removing the deepest of stains. Remove as much of the stain as possible first by patting with a dry paper towel. Add your baking soda onto the floor on top of the stain then pour vinegar onto the baking soda mound – this will begin the chemical reaction. Allow it to bubble for some time then wipe away residue and shop vac. Your stain will be gone!

Amazing Backsplash Cleaner

There are plenty of cleaners on the market today, yet this one you can make in your own home. This degreaser and stain remover is your baking soda and vinegar blend. Start by creating your paste and allow to bubble, apply it onto your backsplash and spread, and then you can use a scrub brush on the grout lines. Lastly, wipe down and enjoy!

Baking soda and vinegar are excellent at cleaning your home. Sometimes we forget to look for a natural remedy we already have. Knowing alternative uses for daily items in your home can save you time and money. For more insight on other secret household cleaners, make sure to subscribe!

Secret Household Cleaners: Lemon

Lemons have many added health benefits. This citrus fruit is loaded with vitamin C, increases iron, and may lower the risk of stroke. However, this yellow pulped, sour fruit has more than just culinary benefits. Lemon’s citric acid also makes an excellent cleaning agent.

Clean Butcher Block or Cutting Board

Butcher block countertops can be challenging to clean. However, cleaning your cutting boards and butcher block counters does not need to be a difficult or elaborate task. Simply, slice a lemon in half. Using the citrus side of the lemon, add table salt. You can now use the gritty texture to scrub clean and remove stains from your wood. This natural remedy makes an excellent alternative to hard chemical cleaning agents.

Tremendous Copper Cleaner

From faucets, pots, and pans to décor and appliances, copper looks great in any home. However, being exposed to the air and other natural elements, copper begins to corrode. Do not let this chemical reaction alarm you because you can remove this green tint with lemon juice. Rejuvenate your copper and get back that shine with some quick lemon juice and salt.

Great Microwave Cleaner

Microwaves tend to build up some muck in them over time but cleaning them may be easier than you think. Fill a microwaveable safe bowl with water. Squeeze your lemons into the water and place the remaining lemons into the bowl. Microwave on high for 3-4 minutes, allowing the water to boil. Once the timer goes off, leave the bowl in the microwave for five to ten minutes. The steam in the microwave will break down the gunk. Then, simply wipe down the walls of the microwave with a paper towel or pour the hot lemon juice onto a dish towel to wipe down the remaining debris.

So, when life hands you lemons, now you are ready for much more. This little citrus fruit packs a punch for household tasks. Learning the uses of everyday household items can allow you to save money and clean your environment naturally. For more insight on other secret household cleaners, make sure to subscribe!

Using Vinegar as a Natural Bathroom Cleaner

Homeowners encourage the use of chemical-free products in their homes to protect their loved ones. Vinegar is a safe bathroom cleaner that avoids the use of harsh chemicals. Plus, you can use vinegar in many areas of your home, but we want to teach you how you can use vinegar to clean your entire bathroom.

Shower Walls

Fill a spray bottle with 1/2 cup of white vinegar and 1/2 cup of water. If the stain is more difficult to remove, mix together 1/2 cup of boiling water with 1/2 cup of white vinegar. Place the mixture into a spray bottle and spray the stained area. Let it sit for approximately fifteen minutes then take a damp cloth and rub it off in a circular motion.

Shower Head

Grab a plastic bag and fill it with white vinegar. Tie the bag to your shower head using a rubber band and let it sit overnight. In the morning, run the shower head’s water and scrub any remaining residue.

Clogged Drains

Fill a pot with water and wait for it to boil. Once the water has begun to boil, take the pot and pour the hot water down your drain. Then take 1/2 cup of baking soda and pour it down the drain. Let the boiling water and baking soda sit for a couple of minutes then pour 1 cup of vinegar and 1 cup of boiling water on top of the baking soda you just put down the drain. Plug the drain and let it sit for no longer than ten minutes. (Note: A reaction is taking place underneath the drain plug so use caution). Lastly, pour another pot of boiling water down the drain to flush out any grim and residue left in the drains.

Sticky Residue

Put white vinegar into a spray bottle and spray a couple of times over the sticky residue. Let it sit for five to ten minutes then take a damp paper towel and wipe away the mess.

Smelly Trashcan

Pour vinegar on top of a piece of bread. Place the soaked bread on top of a paper towel then stick it in the bottom of the trash can overnight. In the morning, the bad smell should be gone!

Vinegar is a versatile household item that can clean various areas of your home. The next time you are in a rut, try cleaning your bathroom with vinegar. It is the perfect alternative to chemical-filled products.