Three Ways to Incorporate Autumn Colors

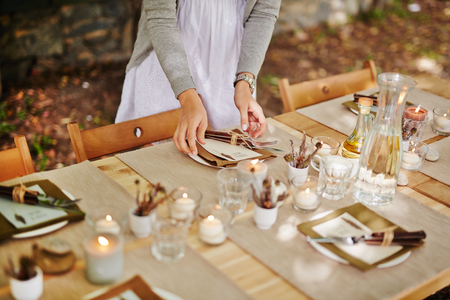
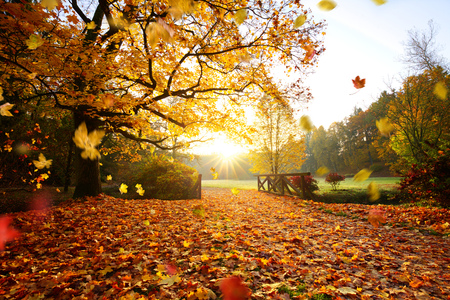
Every season offers a different color palette of beauty! Spring has many fun, bright pastel colors, summer is full of vibrant colors, winter has clean, crisp whites, and fall is full of rich, earthy tones. When you think of fall, you probably think of the colors the leaves turn on the trees. You have your reds, oranges, and yellows. However, fall has an extensive color palette to consider. You also have some very earthy tones that compliment the seasons as well, such as browns, beiges, and forest greens. Incorporating these colors into your seasonal design is a great way to take pride in the changing seasons. Here are three key ways to add autumn colors to your home’s design:

Textiles

Decorating your home for the seasons should not take you weeks to complete. Swapping out some textiles in your home is an easy way to adapt to seasonal décor. Consider pillowcases, towels, blankets, and rugs that can help incorporate some of the beautiful colors fall has to offer. Plaid is also a great pattern to consider using with these earthy tones to make a room feel more comforting and fall-oriented.

Exterior Accents

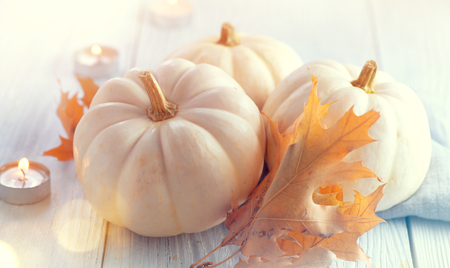
Color can be added externally through many natural remedies. Hay barrels, scarecrows, pumpkins, and cornstalks can all be facilitated to create fall scenery around your entrance. Be creative, but consider your weather. Not everything can stay outdoors during the cooler months. Think of the earthy tones and warm colors fall has to offer. Incorporating these in your exterior design is just one more nod to your seasonal pride!

Holiday Décor

There are two major holidays to consider during the fall season: Halloween and Thanksgiving. Both holidays have very distinct décor you can add to your home. Adding jack o’ lanterns and spooky décor is always fun in October. During November, you may want to incorporate cornucopias as a centerpiece, pilgrim and Indian décor, or cute turkey trinkets around your home. Just remember to enjoy the holiday season through decor, and always express yourself.

There are hundreds of ways to encapsulate the colors of fall. Remember, earthy tones and warm colors help keep the cooler months warmer. Make your home feel like a beautiful fall oasis by keeping the colors flowing throughout. For more ideas on how to decorate for the seasons, make sure to subscribe!

Halloween Safety in the East Valley

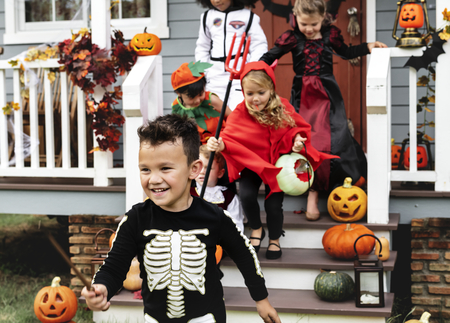
Halloween is a great holiday for the kids! They can dress up as their favorite superhero, princess, zombie, or just something plain silly. Kids can get very excited to go out with their group of friends and go door to door asking for candy. However, in all the excitement, it is important to remember safety first. Your children’s enthusiasm can make this way of thinking easily slip their minds. Preplanning ahead can help optimize you and your loved one’s safety this Halloween.

Prepare for Darkness

Halloween is between 5:30 to 9:30 on Thursday, October 31, 2019. Sunset is at 5:37 pm in the Valley, so it is going to be dark. You should equip all your children with flashlights. Not only can a flashlight illuminate their paths while Trick-or-Treating, but it also can make them easier to see. Children can get excited and run ahead of the group. You and traffic shall be able to see them easier when they are carrying a flashlight. You may also want to consider lighter colored costumes or reflective trick-or-treat bags to help see your children easier.

Have a Plan

The younger children should always have an adult with the group. Whether older children choose to separate is up to you; just remember to plan before the evening begins. Everyone should know where the groups will be. Carry cell phones and know everyone’s phone number in each group. Be familiar with the areas you are trick-or-treating. If anyone gets lost, have an emergency plan. Everyone should know how to call 911 or contact the group. Only houses with their porch lights on are participating in the event. When walking, walk against traffic, and make sure you are seen. Always use sidewalks and paths where they are provided.

Sorting Halloween Candy and Goodies

When the night is over, and everyone gets home, be with your children to sort out the candy. Throw away any open or broken sealed goods. You should be hesitant with anything that was homemade or not wrapped. It is always good to be on the side of caution. Allow your kids to enjoy the experience and trade candies with one another. This can add to the experience of the night and leave everyone happy.

Be safe this Halloween and think ahead. Taking simple precautions is key to a safe and fun night. You should also monitor how much candy your children consume that evening and the following days. Do not let them splurge and get sick, but have fun and enjoy it for weeks to come!

Jack O’ Lanterns 101

Halloween is approaching us, and anticipation is growing. There are hundreds of festive ways to decorate your home and get it ready for Halloween. Fun lawn decorations and spooky décor can always be a great addition to your home. Many people love the activity of creating their very own jack o’ lantern. Jack o’ lanterns are hollowed out pumpkins with holes and features carved into them. A light is then placed inside, which allows these features to glow. This fun tradition is great for the home. If you are looking to add some to your house, here are some basic tips:

The Right Pumpkin

When designing your pumpkin, you need to have the right canvas. Picking the perfect pumpkin can be more challenging than you initially realize. Look for a clean pumpkin with a large surface area. You should know what design you are planning to make prior to picking your pumpkin. When you get home with your pumpkin, draw the face or design your desire on your pumpkin with a sharpie. When you flesh out your pumpkin, it is going to begin the decaying process. So try to time carving your pumpkin as close to Halloween as you can.

Decaying Process

The internals of the pumpkin prolong the decaying process. Once removed, the decaying of your pumpkin will increase tenfold. There are several techniques to help extend this aging process. Most jack o’ lanterns usually have a lid. Instead of carving a lid, cut your hole at the bottom. You can now just sit your pumpkin directly over the candle. Bleach or peppermint castile soap can also be applied to your pumpkin to slow down the decaying process. Use a rag or spray bottle to add bleach or soap to your jack o’ lantern after it has been carved. Petroleum jelly and olive oil can also be used to help seal in some of the moisture of the pumpkin. You will not completely stop the aging process, but you can slow it down some.

Emergency Restoration

If your jack o’ lantern did not survive until Halloween night, you still have one last chance. Instead of buying a new pumpkin and carving it again, you can use this emergency fix. Take your jack o’ lantern and submerge it into a tub of water. The water will absorb back into the vegetable and make it fuller again. This trick does not last a long time but may help it survive the night for Halloween.

Choosing a design and carving your jack o’ lantern is always fun. Enjoy this time with your loved ones when creating the perfect jack o’ lantern. You can make spooky faces or unique artwork. Have fun, and enjoy these seasonal décors while you can, and for more tips and tricks, make sure to subscribe.

The Perfect Father’s Day Gift

Father’s Day is right around the corner on Sunday, June 16, 2019. If you are helping your kids make a gift this year, we have the perfect gift that fathers will adore. The best part is that it is inexpensive and hand-made, two of dad’s favorite adjectives. So this spring, gather the kids and the supplies and let us get started!

Supply List:

  • Wooden Picture Frame
  • Small Sticks (collected from outside)
  • Hot Glue Gun with Glue Sticks
  • White Photo Mat
  • A Family Photo
  • A Fine-Tip Permanent Marker

Step One: Gather the Twigs

Take your kids on a walk through your favorite park or the neighborhood to collect small twigs. You want to make sure that they will be easy enough to break off into smaller pieces. If they are damp, let them sit on top of a paper towel inside of the house for a couple of hours before beginning the project.

Step Two: Snap the Twigs

Gather your kids and all the supplies and head to a cleared off workspace.

  • Pro-Tip: Now is a great time to plug in your hot glue gun so that it is hot and ready for the next step.

Begin designing by either doing a horizontal or vertical placement. You want to begin by placing each twig on the top of the picture frame. Snap each twig off where it covers the frame and does not cover too much of the picture itself.

Step Three: Hot Glue the Twigs onto Your Frame

You will want to place the glue directly on the frame in small lines below each stick. Pick up a stick then run a line of hot glue and place the stick back into its spot. Push the stick down and let the glue harden before you move onto the next twig.

  • Pro-Tip: The step uses an extremely hot tool that can cause burns; therefore, we recommend letting you, the adult, handle this part to avoid any injury.

Step Four: Finishing Touches

Take your white photo mat and measure its size accordingly to your picture frame. Hot glue the corners of your family picture on top of the white photo mat and wait for it to cool. The kids can use a fine-tip permanent marker to write a message to dad on the white photo mat portion. Wait for it to dry and place the photo mat inside of the frame. You will most likely need to secure it in with tape in case it shifts. Place the frame backing on and voila, your gift is ready for dad.

We hope dad loves his gift and wish him a Happy Father’s Day from our family to yours!

Memorial Day BBQ Side Dish Ideas

You may consider Memorial Day the official marker of summertime. It is a time that we honor and remember those who served our country, and you may have decided to host a barbecue and invite a few veterans over to your home. If you are nervous about finding the perfect side dishes to match your BBQ, fear not because here are seven BBQ side dish ideas that you can use for your Memorial Day party:

Roasted Sweet Potato

Looking for something sweet to complement your protein choice? Roasting sweet potatoes is an extremely easy and tasty idea for homeowners. Plus, it is really simple! Just chop them up and drizzle them with olive oil before placing them in the oven!

CrockPot Mac N’ Cheese

Mac n’ cheese is a classic when it comes to barbecues. The best part is you can easily make it in the crockpot for a portable, fast recipe.

Fresh Fruit Salad

Nothing says fresh on a warm day like fruit salad. Plus, fruit salad is an easy, last minute idea that you can throw together. Try adding in your favorite summer fruits for customization.

Brown Sugar Grilled Pineapple

Looking for a dessert that will not show on the scale the next day? Brown sugar pineapples are easy and delicious options for your Labor Day barbecue. Bonus: there are only three ingredients (pineapples, brown sugar, and canola oil)!

Jalapeño Cornbread

If you love spice, you will love this savory side dish! You can add jalapeños into a box mix of cornbread or make them from scratch. Either way, the plate will be cleared off with this delicious side dish.

Baked Garlic Parmesan Fries

Everyone loves a flavorful french fry and adding a garlic parmesan seasoning turns your fries into the talk of the party. All you need is garlic, parsley, salt, olive oil, parmesan, and fresh potatoes to make this snack come true.

Watermelon, Feta, and Mint Salad

Running short on time? You can quickly throw together this 5-ingredient salad in no time! All you need is fresh, seedless watermelon, mint, olive oil, feta cheese, and salt for a new BBQ favorite.

We hope you enjoy your Memorial Day party and that your side dishes are a hit!

Hosting The Ultimate New Year’s Eve Bash

Celebrating New Years at your own home can be a convenient, fun, and safe way to party into the New Years.  With 2019 quickly approaching and the holidays amongst us, it can be challenging to find time to prepare for a New Year’s bash.  To help you throw the ultimate bash, we put together a simple checklist to follow. Let’s take a look!

Invitations

People want to have plans and will start making them very soon.  Make sure you invite everyone you want at your New Year’s party before they schedule other engagements.  Decide how big or how small you want your get together to be.  Also, make sure that the space you designated to hold the party is large enough to host as many people as you invited.  You do not want it to feel overwhelming and crowded during the party. 

Food and Beverages

You will want to decide the food and beverages beforehand.  Will you suggest BYOB or will you be providing them?  You probably will want everyone to have a drink to toast into the New Year.  On that note, if you are hosting the party, be prepared to gather everyone’s attention as the New Year countdown begins.  You should have snacks and beverages to last throughout the evening. 

Driving Arrangements

If you supply alcohol, you should consider how your guest will be returning home.  Will you be accommodating for them to spend the night?  As simple as this may sound, going above and beyond and looking out for your guest wellbeing is part of being a good host.  You do not want the evening to end bad, so make sure you find ways for all your guest to get home before the party begins!

Preparing for your New Years is key to hosting a good party.  Consider decorating for your party as well.  A well-thought-out gathering can go a long way.  Make sure to get some fun streamers and 2019 decor.  New Years is a celebration!  Remember to treat it as such.  

Do you have any fun New Year plans?  Let us know in the comments below and remember to stay safe this New Years!