Hummingbirds

Hummingbirds have been a longtime favorite to many homeowners. They are quick, little beauties that show up around your yard seeking satisfaction from sweet nectar. Hummingbirds do not exclusively love the sweet nectar you provide in your feeder, but they enjoy an array of “nectar producing flowers.” Surprisingly, hummingbirds eat small insects as well. If you are ever struggling with bugs entering your hummingbird feeder, experts encourage you to leave them as a nice snack with their meal. 


Preparing your hummingbird feeder is quite simple. Just always remember the ratio 4 to 1 (sugar to water). You will need to heat your water until the sugar combines with the water, but be careful not to overheat your sweet nectar. You can store your nectar in the refrigerator for two weeks without complications. 


Note: The nectar you are providing the hummingbirds is a “supplement” to the birds. Experts say not to invest in sugars that have extra additives and vitamins. 


If you are looking to attract more hummingbirds to your yard, buy plants that produce a natural nectar and are the color red. In fact that is why the feeders are red, hummingbirds are attracted to this hue. You may have heard of putting red food coloring in your nectar to attract the birds. We encourage you not to use red dye, because it can be potentially dangerous to the hummingbirds. 


Cleaning your hummingbird feeder is essential to keep the birds happy. Hummingbirds are extremely picky with the cleanliness of homeowners’ feeders. Some say that the birds would rather not eat than consume your spoiled nectar. 

  • Never use soap when cleaning out your feeder.  Studies have shown that the birds do not like the taste and will choose not to eat your nectar. 
  • Completely remove any uneaten nectar from the feeder. Take into account how much you are throwing out between each cleaning. If the birds are not eating all the nectar you have provided, decrease the amount of nectar you put into the feeder. 
  • Your feeder will need a deep cleaning at last once a month with bleach. Make sure to fully rinse out all bleach before using. 


We want to make hummingbirds happy, because they tend to make us happy when they are around our yard. We encourage you to follow these tips provided. Have you had success with any different ideas than the ones listed above? If so, we encourage you to share below in the comment section. 


Painted Cabinets Make Kitchen Light and Bright

kitchen-2w

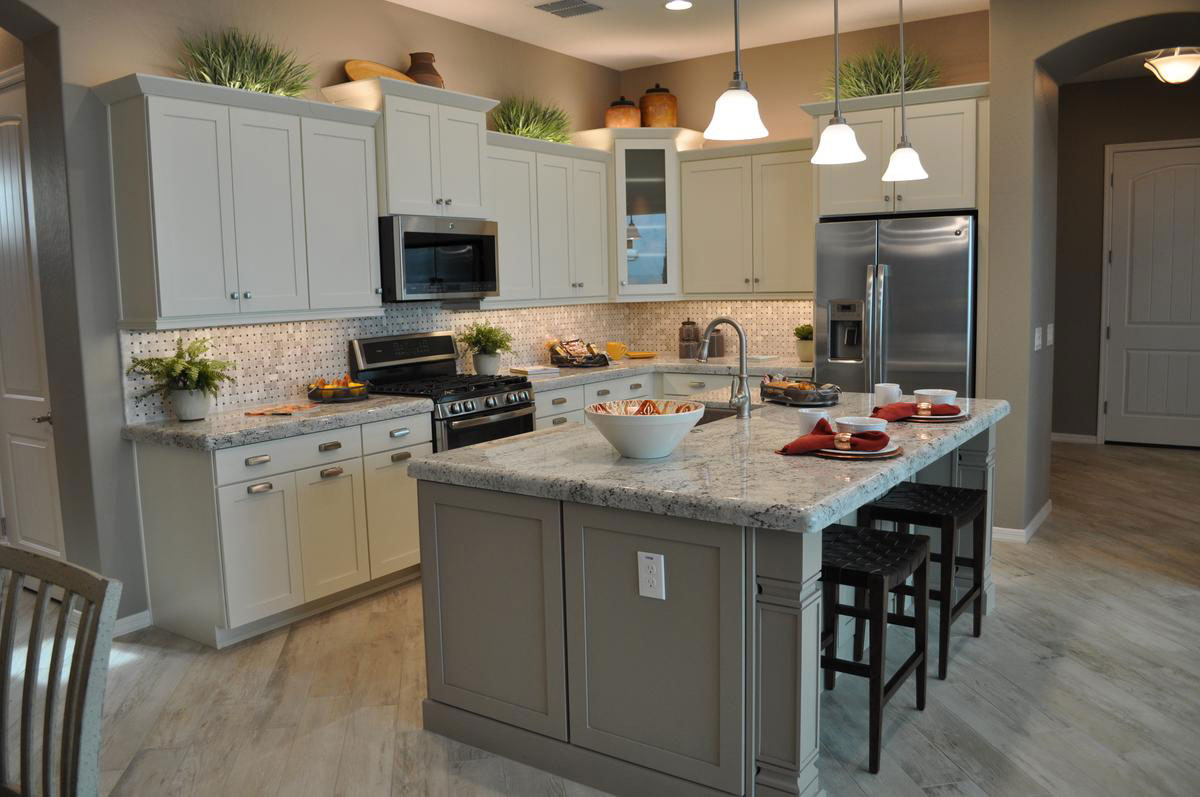
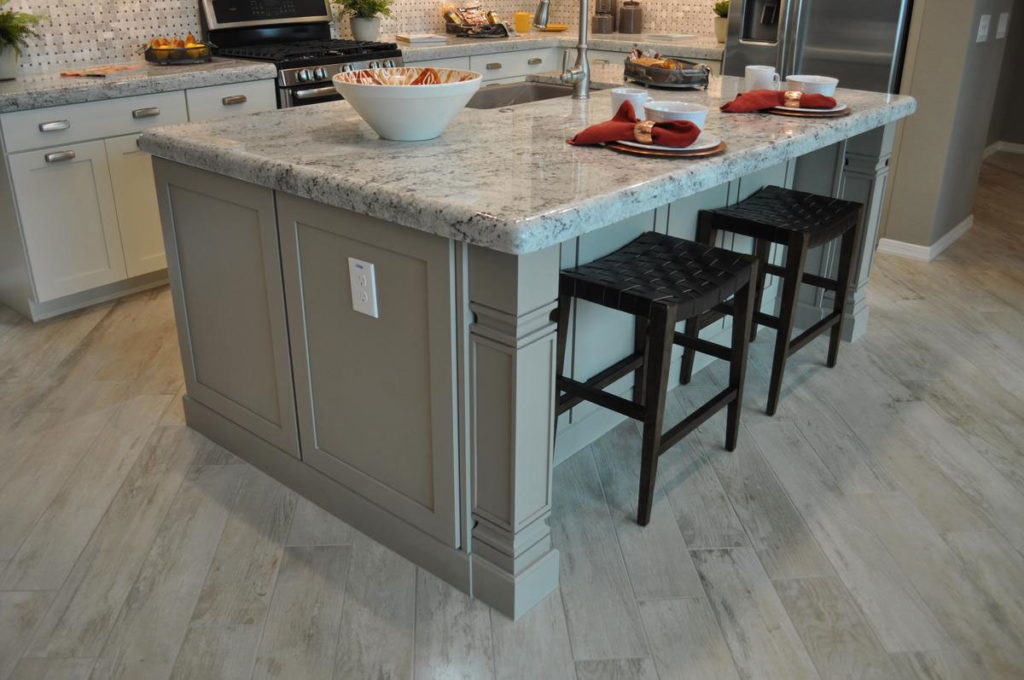
When you’re designing your new Fulton Kitchen, it’s worth considering painted cabinets. They add a light and inviting look to your food preparation space, and keep everything feeling light and bright. With lighter countertops and under-cabinet lighting like this kitchen in the Caravan model in Central Vermont at Cooley Station, the entire room is designed to create a supportive mood that makes it easy to spend time in this kitchen.

There are still a few darker elements for contrast, like the oven and microwave and the comfortable stools at the pull-up eating area on the island. Accessories also add nice pops of color. But the overall mood is light and easy on the eyes.kitchen-1w

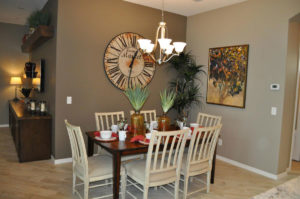
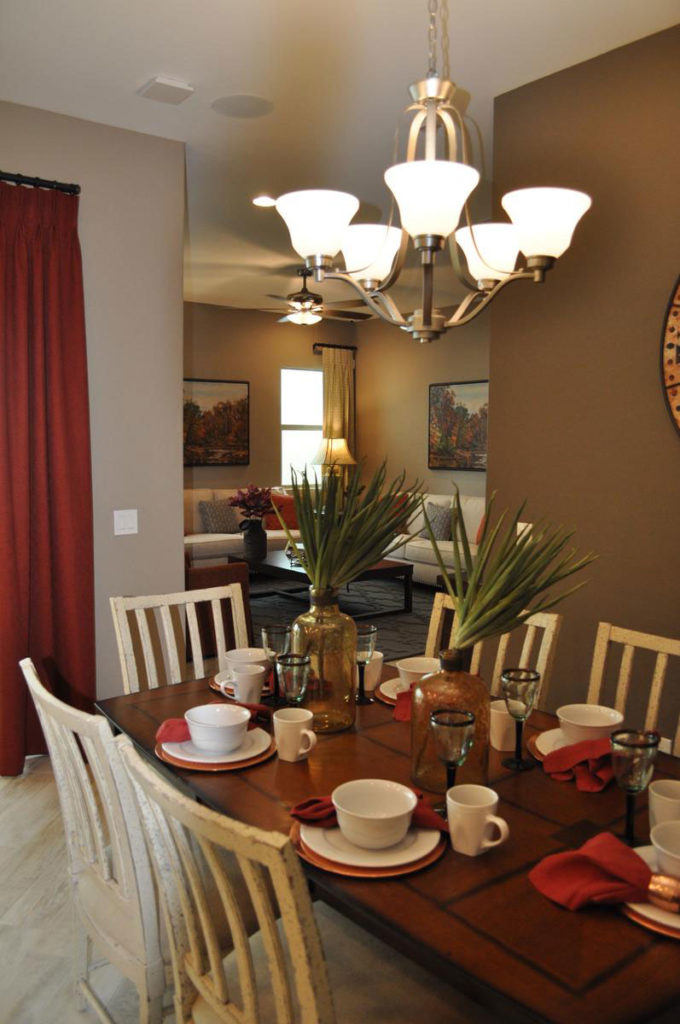
Notice how the accent wall, shown at the back of this photo going into the dining area, provides another contrasting element. At the same time the white dining chairs connects this space with the kitchen.

This is a smart connection between the two spaces, linking them both while still providing a source of much-appreciated contrast. The darker wall also supports a cozy ambiance which is appreciated in a dining space. Notice also the colorful tablescape where the accessories link it to the island. These choices make a home look more like a designed space rather than creating a more scattered feeling. kitchen-6w

Don’t be afraid to mix dark and painted wood. You can see how well it works with this dining table and chair set. The shabby-chic effect on the painted chairs keeps them from seeming too matchy-matchy with the cabinets while still creating a link. While the painted chairs bring the painted kitchen cabinet feel into the space, the dark stained wood echoes other pieces used in the rest of the home. This type of mixing allows you to add just a few new pieces without having to discard the bulk of your furniture if you choose to go in a different style or color direction with your new home.

kitchen-5w

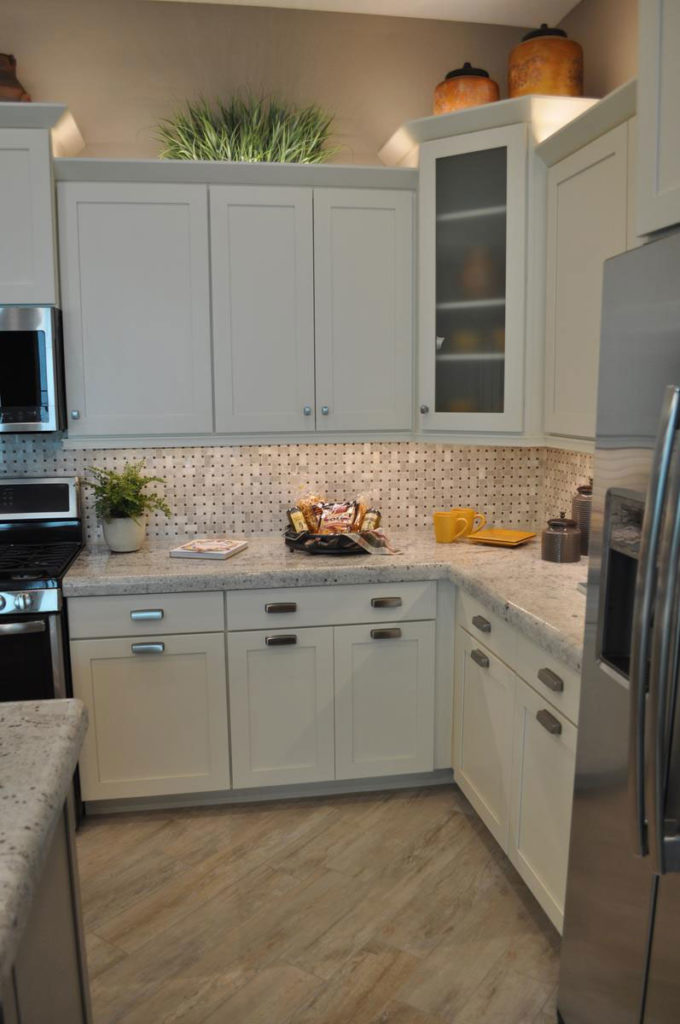
Take a look at another way this kitchen provides contrast without going dark. The addition of one glass-fronted cabinet in the corner adds a welcome and interesting break in the line of top cabinets. Both the height difference and the contrast of the glass add a welcome change in the design. And limiting the glass front to only one cabinet is also a smart budget strategy, because window doors are more expensive. They also require you to maintain tidier cabinets, which can be a nuisance.

kitchen-4w

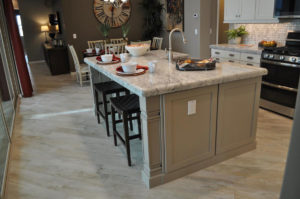
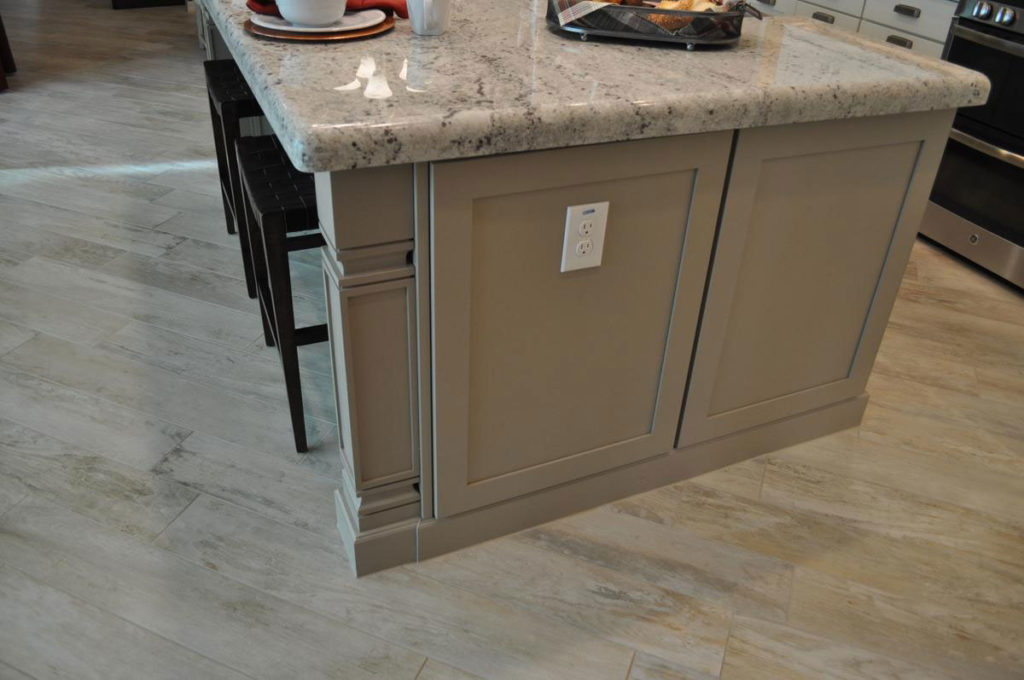
In another opportunity to add an interesting contrast, the island is a soft grey/taupe rather than white. This color works well with the chosen countertops and the flooring, yet it helps the island feel like something special. Choosing a different cabinet color for your island is daring, yet as you can see it can work well.

One reason this color choice works is because the same taupe is echoed in the kitchen’s backsplash. If you notice, the mid-range tone is a close match for the island cabinet color. When you can find ways to make those kinds of connections, you will end up with a kitchen that feels integrated and well thought out.kitchen-3wIt’s interesting to realize that there are actually three fairly strong patterns present in this kitchen: the flooring, the countertops and the backsplash. You can see all three in the photo above. This could easily feel like too much if the contrast within or among the patterns was stronger. Imagine these same patterns in vivid reds and oranges! But because they are all gentle and light in color, the number of patterns isn’t overwhelming. In fact, you almost need these patterns to keep the kitchen interesting. In a way, the patterns take the place of a stronger light/dark contrast you would see in some other kitchens.
Here’s the final interesting design decision with this light bright kitchen. The rest of the open floorplan was designed to focus your eyes in that direction. The diagonal flooring draws the eye toward the kitchen, and the brightness of the space contrasts with the mid-range colors of the dining and family room to draw you toward the light just like a sunflower turning to face the sun. kitchen-7w

The rest of the home is warm and welcoming, with other white elements that mimic the light kitchen such as the sofas in the family room as you can see above. But linking it all, the heart of this home, is the light and bright kitchen, made for a family to live in, eat in, and spend time together in, and above all, enjoy. And that’s the best use you can make of a kitchen, isn’t it?


De-Cluttering Your Garage

One of the most neglected areas of the house for organization is the garage. Our focus usually ends up being concentrated on the sections of the home that will be viewed by visitors the most while the garage ends up playing the role of storage area for the items that don’t necessarily have a proper place indoors. It may not be the first thing on your mind when trying to declutter your home, but making sure that it’s items are easy to access can help your day run much more smoothly.


If possible, clear as many items out of the room as you can. Once they’ve been removed, take an inventory of everything. Of all the pieces that you’ve pulled out, how many are necessary in this space? Is some of it just junk you haven’t had time to dispose of? Do some items belong in a different storage area that you didn’t have time to place them in?  Well, here’s your chance to make it right!


Items you no longer need, organize them into either waste or recycling bins. If you are dealing with hazardous material, check your local waste disposal laws for proper handling. Next, return all misplaced items to their proper storage areas, whether it is an attic, an outdoor shed or even a borrowed item from a neighbor. Now that you’ve pared everything down to essential items only, think about the best way to keep them organized and accessible for future use.


Your garage became cluttered for a reason! New organizational units may be the key to fixing the issue. There are great products available today for every garage size to keep your items organized.   If you don’t have a lot of floor space, hanging overhead shelves can help provide some much-needed storage. Hanging wall units equipped with hooks can help keep gardening and automotive tools at arm’s length for your next project. Hang hooks up high to store bicycles vertically as well as other various sports equipment. If you have a few feet of room available, there are different varieties of metal and wooden shelving and cabinetry for storing miscellaneous workshop items.


Customize these units to your convenience. The easier things are to store after use, the more likely you are to not have to do a major closet clean like this any time soon! 

Ideas for Decorating a Vaulted Room

Decorating a vaulted room can be an exciting undertaking. A few key things to consider when decorating spaces with vaulted ceilings are artwork, curtains and lighting. Here are a few tips for each category.

First, hanging artwork is a great way to decorate a room with vaulted ceilings. There are a few tricks for hanging artwork in a room with an arched ceiling. First, it is important to mimic the ceiling line to complement it. Also, keep wall art around eye level. Finally, vertical rather than horizontal artwork works better with a vaulted ceiling.

Next, curtains are excellent for rooms with vaulted ceilings. There are many options for how to hang them from covering the whole wall or framing windows. There are also many choices when selecting curtains like color, fabric style, and length. Fabric styles vary and have various benefits. For example, polyester is affordable, sturdy and long lasting. Cotton curtains are another option; they drape well, and go well with a modern décor. You can choose sheer cotton for an airy feel or a tightly woven cotton for more privacy. Silk curtains also drape well, and are heavier than cotton. Silk curtains can be damaged by too much sun exposure, so it is important to protect them; they also require dry cleaning, which is something to consider. Linen curtains are also dry clean only, and drape nicely. Natural light easily seeps through the fabric, as it is sheer. Velvet curtains are always a classic choice. They look elegant, and insulate well. Velvet is a heavy fabric, and is a good option for drafty rooms. Finally, lace is another option. Because of the sheer nature of the fabric, lace curtains provide an airy light feel to a room.

Finally, lighting a room with vaulted ceilings is another key feature to make the space look its best. There are several options to choose from, and it is recommended that one layers the lighting by choosing several options. For starters, pendant lights work well. They are often suspended by chains or rods. There are a wide variety of sizes and shapes from which to choose. Another option is track lighting; track lighting is often used with a sloped ceiling. This option allows for greater control over the direction of the light source. The lights situated on the track can be manipulated to face multiple directions at one time. Recessed lighting is also a good choice. Recessed lighting is an excellent choice for adding ambiance to an environment. It can be used to spotlight artwork, or a specific area of the room. Finally, wall lighting is also effective. Wall sconces are an excellent choice in a room with a vaulted ceiling as they can direct light in multiple directions highlighting the height and depth of a room with a vaulted ceiling.

These are a few ideas to help you decorate a room with vaulted ceilings. Please contact us if you have any questions!

How to Hang Mason Jars

Have you ever desired more storage in your kitchen, but do not necessarily have the room to add more cabinets? Your solution is here. Hanging mason jars underneath your cabinets add style and function to any space. Plus, it is super simple to do! 


Supplies

  • Mason Jar 
  • Piece of Wood
  • Hammer 
  • Nail
  • Screw
  • Screw Driver


Depending on the amount of space you have available under your cabinets, you can choose the amount of mason jars you will use for this project. 

*You will need one screw and one nail per one mason jar you use. 


Want to add color? You can even paint the mason jars if you would like to add a pop of color. Remember to paint your mason jar prior to attaching them to your cabinets. If you want a distressed mason jar look, paint the mason jar with color chalkboard paint. After it is finished drying, you can run sandpaper over the areas you want to look distressed. 


Step One. Take the lid off of your mason jar. 

Note: Mason jar lids have two parts associated with them. You will have the physical “rim” and “the flat top.”

Step Two. Grab your piece of wood and set your lid onto of it. Have the lid facing up in a bowl-like resemblance. 

Step Three. Take your hammer and nail and create one small hole in your lid. 

Step Four. Remove the nail and lid from the piece of wood. 

Step Five. Take your lid over to the cabinet that you wish to hang it underneath. 

Step Six. Place your screw inside the hole you just created. Screw it into the bottom of your cabinet. 

Note: It is essential that you make sure your lid is on tight, because your jar will be hanging from the lid. 


Was not that easy? It is a quick and simple way to add style and function to your kitchen or any room in your house. Try this hack anywhere in your home to add extra storage to your space. Just remember to always make sure your lid is screwed into your cabinet tight!

Feminine Bedroom Design

Creating a feminine bedroom theme doesn’t mean you should start loading up on the pink accessories. There are plenty of ways to make sure the room is inviting without being too predictable in your decorating choices. Keeping a few design ideas in mind will help you create the most relaxing spot in your home without having to worry about it looking like a child’s bedroom.  With the appropriate materials and a bit of effort, you can bring your vision to life.


Color is one of the first items that needs to be addressed when creating a feminine space. Soft colors will win the day every time. While white is always going to be a strikingly beautiful choice, also consider soft grays, blues and greens for the room as well. Using a combination of colors will help mix things up and prevent the space from looking dull. Use bolder colors sparingly. Brighter, more shocking colors can give the room too active of a look, which is something you’re not aiming for in the bedroom.


Line is an element of design that will absolutely have influence on a room that is aiming for a gender-specific look. When it comes to decor, items that have curved lines and softer edges are always seen as more feminine than angular pieces. Round side tables, a chaise lounge in the corner of the room and circular light fixtures will all help bring the room’s female factor sky high. Circular picture frames, windows and area rugs are all good design ideas. Use a small amount of angular decor to prevent the softer lines from overwhelming the room.


Finally, textures and materials will bring it all together and give the room a complete look. Soft, flowy curtains, a plush headboard and accent pillows will all contribute to giving the room a soft appearance. A comfy bedspread, decorative lampshades and floral touches are welcome in the space as well. Incorporating glass and crystal accessories will also give the room a polished, feminine look. Finish up with soft, yellow bulbs in your light fixtures to create a beautiful, soft glow throughout the room. 

Clean These Things!

Spring! The weather has already begun to change and moods have begun to be lifted. But, there is one thing you do not want to bring into your spring: germs. Spring cleaning is the ideal time to clean out your house from unwanted items and messes. This spring, focus on cleaning the places that attract unwanted germs. 


Where to clean:


The Remote. There are some truly horrifying statistics about how dirty our remotes are and the reason why they are extremely dirty: everyone touches it! No matter how clean or hygienic you may be, you cannot guarantee others are just as clean and hygienic. You and your family should clean the remote regularly, but especially this spring to avoid transferring germs from winter into your springtime. 

Materials: Alcohol-based wipe. 

What to do: Clean the remote thoroughly with your wipe. 


Toothbrushes. We will spare you the specific details on how dirty your toothbrushes are, but the reason why they become so dirty: your toilet. When you flush, the bacteria enters the air and remains in it for approximately two hours. It is important to keep your toothbrush in a closed space away from the toilet, but also allow it to dry. 

  • Replace your family’s toothbrushes every two-three months. 
  • Always remember to close the toilet’s lid before flushing. 
 

Handles & Door Knobs. Think about it, they are touched constantly without us even realizing it. Even when someone is sick, they still need to touch a door knob. Clean off all door knobs and handles leading to anything. This can get tedious, but so can your family members getting ill. 

Materials: Alcohol-based wipes or preferred cleaning product with a cloth. 

  • Note: Do not forget light switches. 
 

Dishwasher. They contain leftover food and residue, enough said. Cleaning your dishwasher can be done in three easy steps: 

1. Clean out the dishwasher’s drain. This is located beneath your bottom dish rack and may contain unwanted food and residue. 

2. Begin a vinegar wash with 1 cup of white vinegar. You will place the vinegar in a dishwasher safe cup and keep it there during the duration of the cycle. 

3. Lastly, you will complete a baking soda rinse. You will sprinkle one cup of baking soda on the bottom of your dishwasher

  • Complete these rinses on “hot-water cycles.”
 

Fans. Think of all the dust it leaves in your room. Cleaning off your fans will help with allergies from dust. 

Materials: Extendable duster or a cloth and a ladder. 


We hope you and your family stay happy and healthy with these simple tips and that your spring cleaning is efficient and effective this season!


Your Guest Bedroom

If you love to entertain, you understand the importance of having a spare bedroom. An extra bedroom gives guests a comfortable escape from the traditional “couch stay.” No matter the length of their stay, you want guests to feel at home when they stay with you. Guest bedrooms can take on an array of different styles, but there are some essential factors that contribute to an wonderful stay!


1. Keep it cozy. 

Stuffed animals and decorative pillows all over the bed can be cute, but it can also be a hassle to remove each night. Consider keeping the bed as simple as possible for the guests.  

Make sure that if you keep your AC low to provide your guests with extra blankets. There is nothing worse than being cold all night. 


2. Provide an extra phone charger. 

It becomes really difficult to remember to pack everything when you are sleeping at someone else’s home. Phone chargers can be easily forgotten, but they are essential for the next day. Guests will be pleasantly surprised by this feature and it will not go unnoticed. 


3. Dress it up with a mirror.

Mirrors are extremely versatile. They provide a useful feature as well as a stylish one.

If you have a smaller room, consider putting in a large mirror on one of the walls. This tends to make the room look larger than it actually might be. 

Everyone loves a full-length mirror. They are perfect for putting on the final touches to your outfit and making sure everything is in check. If you have room, add a full-length mirror in or near the guest bedroom. 


4. Incorporate a desk/vanity. 

A desk gives your guests somewhere to sit down and write, but it can also be a place filled with necessary items. 

Think about items you would like to have in or on your desk (note pad, pens, pencils, etc.) 


5. Add storage with a dresser.

Your guest will need somewhere to put all of their belongings. If you do not have a closet, make sure to provide them with a dresser. Guests tend to keep the room neater when they have somewhere to put all of their things. 

Trend alert: Try using the dresser as a night stand! 


6. Be Bold.

This is your chance to be bold in your design skills. If you were afraid to try something in your own room, try it out in the guest bedroom! Take a chance with that paint color you were always hesitant to try out; you may be pleasantly surprised.  


7. Light it up.

Lighting can be a very important feature in your guest bedroom. Look for areas of the room with low-lighting and add a lamp. 

If you have room, put a lamp/lighting near the bed for nighttime reading.

Mulching 101

Spring is quickly approaching us and so are all the responsibilities that come along with it. Mulching your garden beds is important to do in mid-to-late spring. It is never too early to start preparing to take care of your gardens. 


Mulching your garden:

Prepare. You have the option to mulch your garden with either organic or inorganic mulch. There are benefits and disadvantages to the different types of mulches and ultimately, it will be your opinion on which you prefer. Keep in mind that the reason we mulch is to keep moisture in our soil!

Organic mulch: decomposes the materials they are made up of overtime. 

  • This type of mulch will add nutrients to your soil but is messier than inorganic mulch. 
  • Bark, manure, wood chips, straw, shells, and leaf mold are all categorized under organic mulch. 

Inorganic mulch: works to eliminate the growth of moss. 

  • This type of mulch is great if you need to keep the leaves of your plant dry because the mulch will not splash onto the leaves.
  • Gravel, stones, and pebbles are considered to be inorganic mulch.

Organic mulch is known to be more of a “functional” mulch and inorganic mulch is known to be there more for the beauty aspect. After you decided on your mulch’s purpose, you will need to pick up your mulch. The amount of mulch you need depends on how big your garden is.

Pull the weeds. Before you begin mulching, you will need to remove all the weeds from the ground. 

Landscaping fabric. This is an optional step, but if you choose to use any landscaping fabric, it goes underneath the mulch. 

Place the mulch. Remember that the more, the merrier! You will need approximately 2-4 inches of mulch. Since its main purpose is to help retain the moisture in our soil, we need a lot of mulch to have a happy garden. 

Disperse the mulch. We now want to disperse the mulch into an even layer. You can use a rake or tool of your preference to complete this step. 


Remember to mulch this spring because, mulching is important for a successful, happy garden. 


Use Antiques to Add Visual Interest to Your Home

Antiques tell a story, hold a bit of mystery to them and always add character to a space.  That’s why it can usually add to the beauty of your home to add a bit of decor to it from time’s past.  Whether large or small, commonplace or unusual, antiques can draw the eye and be a conversation starter.  Collecting items for your home can be very exciting and you may want to start incorporating things right away but your best bet is to do a little research first.  Find out what styles you prefer by visiting a few thrift shops, flea markets and antique stores.  A pattern may emerge and you might notice that you are drawn to a distinct time, styles originating from a certain country or pieces produced by a popular designer of the past. Once you know what you’re looking for, the process can begin!


When it is time to introduce older items into your home’s design, a gradual approach is always best. While you may be a big fan of certain pieces, you also want to be sure that they will look appropriate in your home once you’ve purchased them.  Sprinkle items throughout the space to create flow and allow their placement to look more natural.  Simple ideas can be an old-fashioned spice rack in the kitchen, a gilded mirror in the bathroom and matching antique lamps for your bedroom nightstands. Larger furniture pieces can be used in guest rooms in the form of a dresser or in the dining room with a buffet. 


While some of these suggestions are more functional in nature, it is still a good idea to add artistic pieces to your home. Miniature statues, delicate vases and beautiful artwork will only add charm to a living space.  When properly spaced, guests will be able to appreciate all the modern amenities in your home, while enjoying the old-world appeal of your decor. So, get out there and explore the antique world to find out which pieces best evoke your sense of style!