Eight Ways to Get Your Pantry Organized

With the hustle and bustle of the holidays, your pantry’s organization is more important now than ever. Do not let your pantry go unorganized this holiday season. Follow our seven tips to help organize your pantry before the holiday meals start.

Ways to Get Your Pantry Organized for The Holidays:

  1. Out with The Old. Have you ever thought about how old some of the stuff in your pantry is? Before you can fully organize your pantry, you will need to begin by cleaning it. Only keep food items that you plan on using in the next month or two.  Your unwanted, non-expired canned and boxed food items can be donated to your local food shelter.
  2. Plastic Containers. Some homeowners find themselves wasting space with their plastic containers. When storing your tuber-ware, be sure to stack all the bottoms in one pile and all the lids together. Separating your bases and tops can save you a lot of shelf space!
  3. Get Sorted. Sorting your food by its category is essential. This way cooking and prepping food will become a breeze. Examples of Food Categories: Grains, Breakfast, Canned Goods, Etc.
  4. Clear Containers. A great way to stay organized in your pantry is to throw away boxes and replace them with clear reusable containers. Bulky boxes can take up valuable shelf space, but clear containers can help you find what you are looking for, fast. Once you replace your boxes with clear containers, you can quickly refill them each month.
  5. Kid-Friendly. Your bottom shelf is the most accessible shelf to your little ones. Make this shelf kid-friendly by filling it up with snacks and treats for them to enjoy.
  6. The Pantry Door. The pantry door offers a ton of organizational space just waiting to be used! Be sure to buy a door organizer to store all of your food items.
  7. Stored. Storage on your shelves is currently limited, but you can invest in baskets that hang underneath of your shelves. These baskets will ensure that you are not wasting any valuable space.
  8. Wall Organizer. Do not let your wall space go unused. Invest in some wall organizers to keep your pantry organized to the max!

We hope you enjoyed these tips and tricks. Let us know what you think in the comment section!

Tips for Incorporating an Area Rug into Your Space

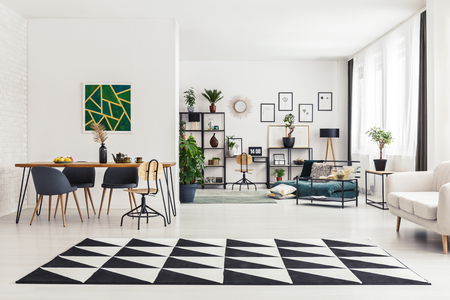
You can dress and warm up your hardwood floors with an area rug. An area rug can help transform your design and create new visual dimensions. With a textured, colored, or patterned rug, you can make your space unique to you. If you are eager about incorporating an area rug, but do not know where to begin, we have four genius ideas for you!

Tips for Incorporating an Area Rug into Your Space:

Pick Patterns.
Patterns can be an extraordinary tool for active households. Patterns can give homeowners peace of mind with accidental spills and stains because they help to minimize the effects caused by staining. Not only are they great for durability, but they are also visually appealing. By including a patterned area rug into your design, you help to add an intriguing visual element to the overall space.

Do Not Discount Durability.
When searching for an area rug, it is essential to find one that is durable to everyday wear and tear. You want one that protects against accidents and gives you time to get to the accident.

Perfect Placement.
An area rug holds a lot of potential if properly placed within your space. To begin, you want to make sure that your rug is smaller than the area covered by your furniture. This is a common mistake made by homeowners, but it can be an easy fix. You want only the front “legs” of furniture on top of the rug. This will help make the space feel more visually open.

Complimentary or Creative.
There are two ways to approach adding an area rug into your space: the complimentary look or the creative way. Neither one is better or worse than the other; it solely depends on your design style. For the complimentary area rug look, you will want to select a neutral color that subtly fits into the design. For the creative area rug look, you can go all out with the rug and pull the room’s design back in with subtle furniture and decor.

We hope that you enjoyed these tips and tricks!

How to Organize Your Garage

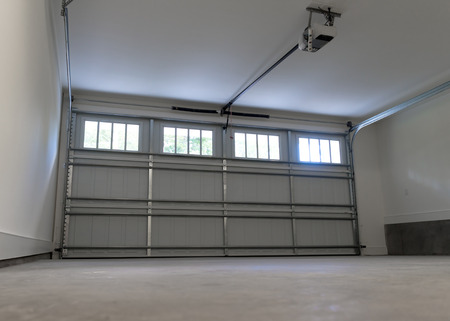
You may store your cars, boxes, tools, or miscellaneous items in your garage and that is absolutely okay. But we want to help you take your unorganized garage and transform it into a fully functional space. Here are six ideas to organize your garage:

Metal Chain Organizer: Attach a hook to your garage wall then hang one end of a metal chain onto it. Tightly wrap up your garden hose and secure it on the metal chain. Attach the other side of the metal chain to your hook and voila, no more tangled garden hoses. It is just that easy.

Window Planter Storage: If you find yourself with a lot of little, miscellaneous items, try using a window planter for storage. You can store things like car wash supplies, spray cans, and gardening tools.

Old Lockers Transformed: Lockers are not just meant for books and backpacks, but they are perfect for storing all garage-worthy items. Touch them up with a nice coat of spray paint, and they will look brand new.

Rethink Old Golf Bags: Before you toss out your old golf bag, use it for storing larger items like racks and shovels. You can even utilize the smaller pockets for things like gardening tools and gloves.

Tipped-Over Filing Cabinet: Transform your old filing cabinet into a storage bin by turning it over on its side. Have the drawers facing up then remove the physical drawers from the cabinet. You will be left with four open basins to fill with all your garage supplies like racks, shovels, and mops. If you are looking for a more aesthetically appealing organizer, try to spray paint it a fun summer color to bring beauty into your garage.

Mason Jars: Store all your tiny screws and nails in one place with mason jars. You can even purchase them in a variety of sizes for different projects. You will never lose track of your nails again with this quick fix.

We hope you enjoyed these garage organizing tips and tricks. How do you keep your garage organized? We would love to hear from you in the comment section.

Office Organization Tips for Your Home or Workplace

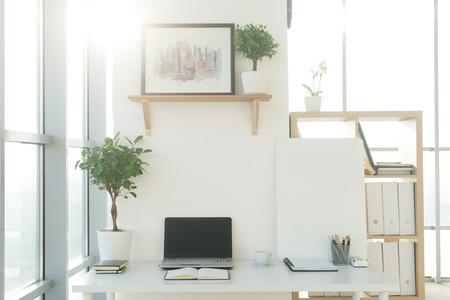
Your home or work office may not be living up to its full potential. Maybe you have not had time to buy a filing system, or your junk drawer is getting more significant as the days go on, but we are here to help. No matter which office you are trying to organize, you can take these four tips to maximize its functionality and usability. Let’s get started:

How to Organize Your Office (Home or Work):

Tip No. One: Separate Your Supplies.

Designate a specific area in your office for everything. Spend time organizing your office supplies and separating them into specific groups. Have your papers (sticky-notes, notepads, reams of paper), writing utensils (pens, pencils, markers, highlighters), and other materials in groups of a kind.  Once you have separated the items, place them into drawers that maximize your movement. Put the office supplies that you frequently use within an arm’s reach. This will help you to be more productive at work.

Tip No. Two: Remove Excess Paper from Your Desktop.

Only allow yourself to keep the bare minimum on your desktop. Remove all expired sticky-notes and space wasters. Try to limit yourself to the essentials (pens, paper, calendar, telephone, computer, etc.) The less you have on your desktop; the less stress you will have when you are trying to find something.

Tip No. Three: Install a Shelving System.

Think about all the wasted space on your walls that you could have used for storage. Make sure it is okay with your company before you drill into the walls, but try and incorporate a storage system. You can place binders, books, and reams of paper on the shelves and free up space on your desktop.

Tip No. Four: Use Your Technology.

Instead of owning a thousand papers and filing them in your actual office, make a digital copy on your computer. We only recommend doing this for paperwork that is not extremely important. You can create folders on your computer to store all of your paperwork. Just simply scan them onto your desktop.

We hope you enjoyed these quick and easy tips for organizing your office! Let us know your thoughts in the comment section.

Tips for Organizing Your Home’s Closets

Luckily, spring cleaning is not the only time for you to clean out your closets and get a fresh start on everything home-related. Winter can be an excellent time to rearrange your belongings and sort through your unwanted items to create a clean and organized space. If you are ready to roll up your sleeves and take on this task, you will definitely want to keep on reading!

Tips for Organizing Your Closet:

Remove Everything.
Before you begin the organizational process, you will want to take everything out of the closet (literally, everything). While you are taking everything out, you can begin to divide your closet items into piles.

The piles include: keep, donate, and trash.

Pro-Tip: Professional organizers recommend asking yourself “would I repurchase this?” By asking yourself this question, you can determine its usefulness in your closet. If the answer is no, look at its condition and decide if you can donate it.

Incorporate Organizational Systems.
If you have the money, you may want to consider purchasing some form of an organizational system. Items like cubbies, multiple clothing bars, and extra drawers and shelves can be a lifesaver!

Consistency is Key.
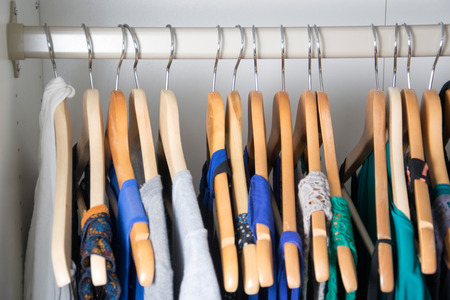
We recommend using the same hangers throughout your newly organized closet. This can keep it looking tidy and neat.

Labeled Dividers.
If you are a fan of dividing your clothing, you may be interested in purchasing labeled dividers. The dividers are placed in front of each clothing section to denote what clothing is behind it. This is perfect for busy homeowners who would appreciate extra guidance on laundry day.

Place Bins on Your Shelves.
Do not let the shelving above your clothing bar go unused. Take advantage of this remarkable space by placing stylish bins to store your out-of-season clothing.

Add Extra Lighting.
If you find yourself struggling to see your clothing options in the morning, you may want to consider adding extra lighting near or inside of your closet. This will help you see all of your options and maybe encourage you to wear some of your underused items.

Finishing Touch.
No closet is complete without a mirror. Be sure to add a mirror near or inside of your closet to complete your look.

We hope you enjoyed these tips and tricks! Let us know what you think below in the comment section.

How to Work with Zebra Print

Do you love zebra print but do not know how to use it in your decor? While colors pack a lot of punch, patterns can have a dramatic effect. Using a zebra print pattern can be tricky because it can be considered bold and busy. To help you master it, here are some tips for using zebra prints in an attractive way:

1. Combine with Lots of Neutrals

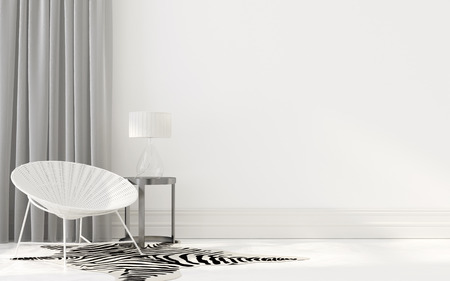
Perhaps the easiest way to incorporate zebra prints is to use lots of airy whites and sheer materials. Even mixing in this pattern with hues of gray will help it to blend in with the decor seamlessly. Gray and white colors, when combined with a zebra print, create a feisty and sophisticated feel. Zebra print can be a great way to create a look that is inviting yet stylish.

2. Upholstery

Do not be afraid of using zebra prints on your upholstery. We often think that our furniture has to match, and often times, this is far from the truth. Using a zebra print slipcover over your living room chair or sofa will make the piece stand out against all your other pieces.It can create a bold statement piece that is absolutely beautiful.

3. Accessories Take a Backseat

From your antique case to your favorite unique pieces, we love our accessories. When working with a bold print like zebra, the accessories should be kept to a minimum. You do not want your accessories to compete with the print, but rather, it should complement it.

4. Use Colors

If you are more on the daring side, implementing bold colors with a zebra print may be for you. Luckily, zebra prints go with literally every color out there because it is made up of white and black. Play around with some ideas and get creative with your color choices.

5. Area Rug

If you are not interested in going all out with the zebra print, you can use hints of the print throughout your room. A zebra pattern area rug against your furnishings is guaranteed to add a pop.

6. Accessories

You do not have to overwhelm a space with a zebra print to make a statement. You can use accessories with a zebra print design sparingly throughout the room. For instance, a zebra blanket on your bed or zebra stripe decorative tape on the wall will add lots of visual interest.

How do you incorporate fun patterns throughout your space? We would love to hear below in the comment section.

How to Pick The Perfect Accent Chair

From deep, soft leather chairs to traditional upholstered chairs, when it comes to shopping for an accent chair, there is a variety of options. If you are having trouble finding the perfect accent chair, know that there is one out there that fits your personality as well as the decor of the room. To help, we created a list of different accent chairs that may be suitable for your space. Let’s take a look!

1. Classic
If you have more of a traditional style, you will most likely appreciate a timeless design. Materials like leather, wood, and heavy, rich fabrics are common for classic style accent chairs; however, if you are interested in incorporating a classic style with a bit of a twist, you may choose to go with a bold upholstery color or pattern. Believe it or not, a classic style accent chair can work with all types of home styles including, contemporary, country farmhouse, and even industrial. It is all about making such classic pieces relevant. Consider reupholstering a traditional chair with a punchier color like mustard yellow, forest green, or maroon to create a powerful statement.

2. Sophisticated-Chic
Do you enjoy the finer things in life? If your style leans more towards sophisticated pieces, you are probably drawn to accent chairs that are elegant but have something unique that sets them apart from what you usually see. Remember, sophisticated chairs do not need to be boring or stuffy. You can find a stylish, sophisticated chair that adds interest without taking away from the room’s overall mood. If you do opt for a sophisticated, chic accent chair, you will want to keep the other elements in the room neutral so that the accent chair can take front and center stage.

3. Ultra Modern
If you consider your style to be ultra-modern, you would be interested in what is trending right now. Modern style accent chairs have clean lines and unique silhouettes which makes them stand out and look good from afar. Look out for contemporary styles, and try mixing different contemporary styles together within the same space.

4. Boho
If bold hues and unusual patterns do not scare you, boho is for you. With Boho design, you mix together different patterns to create a flawless design. If you cannot find an accent chair that speaks to your soul, you can even make one. Consider reupholstering a traditional wingback armchair, or try layering it with prints and colors. Be sure to keep a consistent color to create a harmonized look.

What accent chair speaks to you the most? We would love to hear below in the comment section!

Tips for Doing Laundry

Laundry is a bit like a Monday morning. No one really looks forward to it, but every week it must be done. Laundry is frustrating because it contains a ton of steps: washing, drying, folding, hanging, ironing, and then putting away each item. We want to help make doing your laundry a little bit easier with these simple tips:

Make a Plan. One of the most challenging parts about doing laundry is the fact that you do not know when you will have time to do it. Stick to a consistent schedule to ensure that you will always have clean clothes for your family. Making a plan can be beneficial in other ways; the longer you wait to do laundry, the longer stains, wrinkles, and unwanted smells can stay in the clothing. Make a plan and stick to it.

Stacks on Stacks. Laundry needs to be sorted in order to wash each load properly. Make sure you have enough baskets to sort your laundry. Sometimes when we lay laundry on the floor, it gets in the way of doing other activities. Not to mention, kids or pets can run across the clothing creating more of a mess. Depending on the size of your home, invest in some baskets to organize your laundry. Bins can be stacked and put away if you do not have a laundry room to store them.

Do Not Let Them Stick Around. Stains must be dealt with as soon as possible. Sometimes it is easier to pass over stains if your laundry room has poor lighting. Go to a room that has good lighting to recognize any stains on your clothing. When sorting through your laundry, focus on first washing clothing that has stains on it. Buy a stain remover to ensure the removal of your stains and always wash it out as soon as possible.

Hang in There. Installing a clothing rod for your laundry room will be extremely beneficial for your laundry routine. Clean clothes can go on the clothing rod to be put away or to be steamed/ironed. The clothing rod will help keep your laundry room in tiptop shape.

High There. Take advantage of the space high up in your laundry for products that contain chemicals. Being safe includes being smart, store your hazardous items high up so that small children and pets cannot get into them.

We hope all your socks find their matching pair and that doing your laundry feels like a Friday.

Creating a Clean House in Under an Hour

Cleaning your house does not need to take an unnecessarily long time. Set a time limit that you want to spend on each room and get it done faster and more effectively. We have compiled the perfect “Clean House List,” and we want to share it with you. This list is excellent if you are having unexpected company over and do not have time to do your usual full clean. The best part of the list is that it can all be accomplished within 45 minutes! Let’s take a look!

Room One: The Front Entrance. Time Limit: 5 minutes.

  • Straighten up all shoes and jackets.
  • Sweep or vacuum the front entrance’s flooring.

Room Two: The Living Room. Time Limit: 15 minutes.

  • Gather any items that are laying around and place them in their correct home.
  • Fold blankets and rearrange pillows.
  • Take a microfiber cloth and run it across your hard surfaces (tables and television).
  • If possible, open your window to welcome in a fresh air flow.
  • Remove all pet fur from the couches with a lint roller.

Room Three: The Kitchen. Time Limit: 15 minutes.

  • Take everything off the counters and wipe them off with a disinfectant wipe.
  • Clean up your sink area and remove any food residue.
  • Replace the old dishtowels and hang new ones.
  • Take out the trash and put a fresh bag inside the trashcan.
  • Kitchens may have an odor; light some candles to freshen the air before guest arrive.

Room Four: The Main Bathroom. Time Limit: 20 minutes.

  • Pour toilet bowl cleaner into the toilet bowl and let it sit for approximately five minutes.
  • Remove all dirty clothes and towels from the bathroom and place them into a laundry basket. Store the basket in either your bathroom closet or in your laundry room.
  • Take everything off of the countertop and begin to wipe them down with a disinfecting spray.
  • Using a sponge, scrub the inside of the sink and then use water to rinse away leftover disinfectant spray.
  • Grab some glass cleaner and spray your mirrors to remove all fingerprints and dirt.
  • Go back to your toilet and scrub out the bowl. Flush the remaining solution.
  • Take a disinfectant wipe and wipe down the toilet seat before your guests arrive.
  • Straighten the bathroom rugs and close the shower curtain.
  • Take out the trash and replace the bag.

Voila! You are done and ready to enjoy the company of your guests.

How to Style Throw Pillows Like a Pro

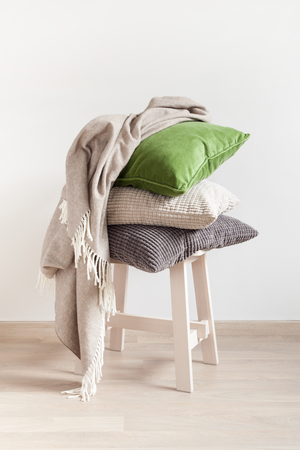
From vibrant, bold hues to jazzy patterns, throw pillows are a fabulous way to accent or spice up the bed or sofa. Whether you are decorating the couch in the living room or the bed in the master room, putting together the right combination of throw pillows can be much harder than it looks. In fact, mixing patterns and colors is an art. Here are some secrets for styling throw pillows like a professional:

Don’t Make This Mistake

Perhaps the biggest mistake that homeowners make when selecting throw pillows is playing it too safe. The great thing about such an accent piece is that they are typically used sparingly which means that you have room to play around with pattern and color without overwhelming the space. As the most significant piece of furniture in the room, the sofa or bed is usually a neutral color. Using neutral colored throw pillows can create a whitewashed effect. If you have a neutral bed or couch, we recommend throwing in some pops of color to brighten up the space and add style. 

Meshing Throw Pillows With Your Decor

Are you worried that a specific throw pillow will not work well with your room’s decor?  Vibrant colors and patterns work well in any space as long as it harmonizes with something else in the room such as a piece of artwork, the rug or even a chair.  A throw pillow can look out of place in a space if it does not match well with anything in the room. Create a cohesive look by seeking inspiration from another element in the room.

The Secret to Mixing Patterns

The key to tastefully mixing patterns is finding a common link between the patterns. Different patterns can look great together when they use a similar color or tone. Solid colored throw pillows mesh well with both large and small scaled patterns. Mixing solid hued throw pillows with patterns creates a balanced yet playful look. Avoid mixing more than three different patterns together in one setting. 

Where Should You Place Throw Pillows?

So where is the best spot for throw pillows? This largely depends on the set up of the sofa or the bed. Most designers will recommend placing throw pillows at the end or the corners of the seating area or bed. For a large couch or bed, you will need at least two throw pillows at both opposite ends. Leaving the midsection provides ample room for sitting or laying down.

Remember to keep functionality in mind as well as have fun with it. Designing is a unique expression of style. Do whatever makes you happy and you will not be disappointed.