Ways to Enhance Your Sunroom

A sunroom is a great addition to any home! Sunrooms allow you to enjoy the natural lighting from the outdoors in the comfort of your home. These seasonal rooms are perfect for people who want to spend more time outside. It is the perfect hybrid of interior and exterior home living. If you have a sunroom or are looking to add one, there are some simple ways to help enhance your space. Let’s take a look!

Seating

Every great sunroom will incorporate a type of seating. These rooms typically use furniture that can withstand the elements of nature. While your sunroom may not get rain inside it, it can experience more humidity and exposure to some of nature’s harsher elements. Consider patio furniture with cushions or some whicker seating. You can also add some more outdoorsy details such as a hammock or a suspended chair.

Throw Rug

A way to add some style to your room is by getting an area rug. A rug can help add comfort to your outdoor flooring. Most sunrooms are not fully finished and can experience some moisture. Make sure your rug can handle moisture. Typically, indoor/outdoor carpet is preferred. You can also invest in turf or composite tile to give your room a little extra styling.

Biophilia

Sunrooms are the perfect place to incorporate plant life! There is no spot better in your home for more sun exposure. Adding plants and herbs can help add life to your atmosphere. This perfect blend of indoor and outdoor living will feel more balanced with a little more greenery. Just remember to water your plants because they will not experience rain!

Whether you plan on just reading out there or enjoying the sounds of nature, sunrooms are a terrific place to unwind. With a little love, these rooms can become your favorite place to spend your morning or afternoons. What do you love about your sunroom? Let us know below in the comment section!

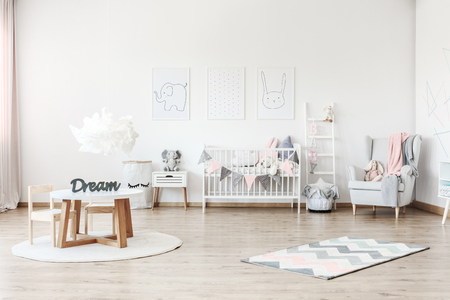
Tips for Creating a Great Play Room for a Child

If you are lucky enough to have some extra space in your home to dedicate to a play area for your child, we have some suggestions for you on how to make it great! The early years of a child’s life include a significant amount of brain development, so you want to make sure they are using their imaginations and have an enjoyable environment to develop their talents. Making sure they have a safe place to do this is essential. Here is how to get started:

You Must Be This Tall to Play

No matter the size of the room, there is something you can do to improve it for your child’s use. The most important thing to think about when the child enters the room is ease of use. Smaller chairs and tables, as well as fun colors and decor, will help set the stage and let them know that this is a space made for fun. Keep shelves lower and storage easily accessible, so whatever they take out can also be placed back there by them. This teaches them their first chores and responsibilities while simultaneously helping you out with clean up!

Let Creativity Flow

If your child has a particular hobby or interest, be sure to supply them with what they need to develop it. Whether it is art, photography, or books, be sure to create a little area for them to spend time creating and reading about new things. Provide books, a desk area, and arts and crafts supplies so they can let their imaginations run wild. Use a wall for displaying their work and create a safe spot for them to pause their progress until the next day. Knowing when to clean up items and leave them alone will not only show your child that you trust them, but it will let them know that you respect their space as well.

Sharing Is Caring

Finally, keep in mind that although they may spend a lot of time using this area as their own personal space, there are going to be times when they are going to want to share in it with others. This may include you, other family members, or friends. Be sure there is sufficient space not only for your child to play independently but for them to share the space and play well with others.

Have you created a play space before in your home? What do you feel are crucial elements of it? Let us know below in the comment section.

Should I Match My Curtains with My Decor?

Should you match your curtains to your decor? This is a question that homeowners often encounter when planning for the perfect design scheme. However, when you consider how expensive it is to invest in quality window treatments, it can cause a bit of stress. Ultimately, your window dressings help make the overall design of a space, so you want to choose drapes that harmonize with the color and style of the room. As simple as it sounds, matching your window dressing to your decor is not as easy as it sounds. Here are some tips to help you pick out the right drapes:

Matching the Walls

An option is to select curtains that are similar to your wall colors. If your decor utilizes a variety of hues, matching your window dressing to the wall makes the arrangement less visually intrusive, especially if you do not want your design elements to compete with each other.

If you love your wall colors, purchasing drapery featuring a similar hue is your safe bet. You can select drapes that are slightly lighter or darker for a subtle effect. On the other hand, if you decide to change the room’s wall color in the future, you will probably have to switch out your drapes.

Stick to Neutral Palettes

When shopping for drapes that will match your decor, try to stick to draperies that embrace neutral palettes, look for solid colors or prints with solid hues. It can be the safest approach, especially when it comes to purchasing ready-made pieces. The downside to this approach is that it may come across as bland.

Create a Contrast

Another way you can match your curtains to your decor is to create a contrast. Use a brighter color or pattern for a bold contrast. This makes a big visual statement, and it is great for smaller spaces because the drapes can serve as the focal point.

Monochromatic Scheme

You can match your curtains to your decor through a monochromatic design scheme. Your carpet, furniture, and curtains do not have to match exactly. They just have to blend well together. You can use a variety of colors used in your decor for your draperies to create a look that harmonizes everything together.

For the ultimate design advice, be sure to visit Fulton Home’s Design Center.

Pumpkin Spice Smoothie Recipe

If you are like us, everywhere we turn, we see something to do with pumpkins: pumpkin decorations, pumpkin pies, pumpkin cupcakes, and pumpkin lattes. The color orange is the perfect fall color since orange is a happy color, and it is that highlighter color that grabs your attention! With the smell of pumpkin spice permeating the air, what better way to celebrate fall than by making a healthy and tasty pumpkin smoothie!

Pumpkin Spice Smoothie

Prep time – 5 Minutes | Cook/Chill Time – 3 hours | Total Time – 3 hours 5 minutes

Serving Size – One Serving

Ingredients:

  • 2 Tbsp Pumpkin Puree
  • 2 Pitted Dates or 1 to 1 ½ Tbsp of Honey or Maple Syrup
  • 1 Cup Rolled Oats (Gluten-Free if Preferred)
  • ¼ to ½ tsp Instant Coffee Granules (If you are unsure about adding coffee, start with ¼ tsp and increase to ½ tsp according to personal preference)
  • ¾ cup Unsweetened Almond Milk
  • ½ Tbsp Almond Butter
  • ¼ tsp Ground Cinnamon
  • ¼ tsp Ground Nutmeg

Directions:

  1. The night before, add all ingredients to your blender and make sure you stir them well (you are not blending yet). Cover and place in the fridge for a minimum of 3 hours. You can eliminate this step, but soaking the oats overnight- it will make the smoothie creamier.  
  2. When ready to make, blend on high until the oats and dates are fully broken down. Blend until you have a smooth and creamy consistency. If the smoothie is too thick, just add a little almond milk. 
  3. You can enjoy the smoothie cold or warm. To drink warm, add the mixture to a small saucepan over medium heat and bring to a boil. If the smoothie becomes too thick when cooking, simply add a splash of almond milk.  

We hope this recipe helps you to kick off the fall season. Happy October!

Creating Your Own Inexpensive Spa Bathroom

We would all love to go to an expensive spa to destress and come out feeling like a rejuvenated person from head to toe. While it may not be feasible with your budget or schedule, you can create your own calming sanctuary at home. To help you master this spa oasis, we have listed a few simple tips below for turning your bathroom into a relaxing spa-like retreat. Let’s take a look!

Tranquil Colors

Spas use light colors for a calming effect that give the space an organic, relaxed feel. Pale blues and seafoam greens lend a soothing sense to the space’s overall feel. White is a great base color where you can add accents of pale blue-greens to keep the space from feeling too sterile. If blue-greens do not appeal to you, use neutral colors like taupe and linen to accomplish the tranquil feel.

Real Life Greenery

Bringing houseplants into the bathroom says “zen” more than any temporary change you can introduce. Group a small cluster of house plants in ceramic and glass containers on the counter for a welcoming and inviting feel, and do not overlook putting an orchid in the bathroom for a romantic, island-like feel. Since orchids love the humidity, they will do great in the bathroom. Just make sure they receive 3-6 hours of indirect sunlight per day. Also, go to your local farmer’s market or greenhouse and buy some fresh eucalyptus. Tie the eucalyptus together at the base with some rope and hang over the showerhead. The moisture from the shower will help to spread the lovely fragrance throughout the room and the home.

Aromatherapy

Aromatherapy is the practice of using oils, including essential oils, for psychological and physical well-being. Essential oils, the pure essence of a plant, have been found to provide both psychological and physical benefits when used correctly and safely. Head to your local aromatherapy store and start researching what to purchase for your spa-like bath; lavender is always a favorite. You can place diffusers on the countertop nestled in with the houseplants for a clean look. Also, do not forget lovely smelling bath salts or fresh rose petals to add to your warm and relaxing bath.

Now that you have made some quick and easy additions to your bathroom, do not forget that prolonged relaxation is a must to enjoy every second of your spa-like bathroom. Relax and enjoy!

Preparing for an Outdoor Get-Together

Just because summer is officially over and your friends may stop hosting backyard barbecues and pool parties does not mean that you cannot take advantage of Arizona’s gorgeous fall weather with an outdoor get-together. Get ready for your company to come over with five easy outdoor updates. All you need are these five easy steps to transform your yard into the perfect outdoor getaway.

Prep the Yard

Before you begin, make sure you wipe down your patio furniture, clean up any the leaves from your fruit trees, mow the lawn, sweep the patio, and trim any outgrown bushes. 

Disinvite Bugs

Bugs can be a real party crasher on outdoor gatherings. Eliminate bugs in a safe way by purchasing citronella candles. You can even make your own by using citronella oil in your custom candles. 

Light up the Night

Get-togethers can run late into the middle of the night; therefore, you should be prepared by hanging some stringed lighting. String lighting looks beautiful and is an inexpensive way to light up your backyard. 

Deep Clean Your Grill

Between each cookout and party, your grill can take a beating from food and grime. Make sure to deep clean your grill with these steps:

  1. Turn on your grill to begin warming it up. 
  2. After the grill is warmed, take a heavy-duty grill scraper and begin removing all grime on the cooktop.
  3. Take a wire grill brush and scrub the heated grates.
  4. Let the grates cool down then put them in a bucket with warm, soapy water. Have them sit for 2-3 hours then using a scouring sponge wipe away any remaining grime. 
  5. Using a degreaser, wipe down the outside of the grill with a damp sponge. Afterward, you will want to dry it off with a microfiber cloth. 
  6. Using a microfiber cloth and stainless-steel cleaner, shine off the exterior of the grill. 

Provide Warmth

Arizona nights can get pretty cool, so if you plan on hosting well into the evening, you will want to provide some heaters or blankets. By adding warmers, you will be able to continue the party even when the sun drops.

We hope you enjoyed these simple tips for preparing your yard for a get-together. Let us know how you host guests outdoors in the comment section.

Tips for Pressure Washing Your Home

Whether your home is older or just becoming dirty on the outside, there is no more convenient or cost-effective way to clean the siding of your home than a pressure washer. It can easily blast away mildew, dirt, and muck that would take hours to remove by hand. If you are new to the concept, here is what you should know:

Safety

When pressure washing your home, make sure your siding can handle it. Concrete, vinyl, brick, and stone are all capable of handling a strong pressure washer (even stucco with the proper procedure). If your house has been painted, be cognitive that no lead was used in the paint. This can release harmful vapor you can breathe. Inspect your home for any areas that will need special attention. Remember, do not pressure wash your windows; they will break! Also, you should wear a pair of safety gloves and safety goggles at all time. The high-pressure water is strong enough to literally cut you! It is important to be aware of its power at all times and remember to stay safe.

What Is a Pressure Washer?

Your typical garden hose has an average of 35 psi. PSI is a measurement of Pounds Per Square Inch. A pressure washer will hook up to your house and amplify that tremendously. Some pressure washer will range from 1500-3500 PSI, but you can find some in a wide variety of ranges. Pressure washers can come electric, cordless, or gas-powered. The stronger the PSI, the more heavy-duty grime you will be able to remove.

Setting up Your Pressure Washer

Attach your garden hose and turn on the water. Your pressure washer will have an inlet and an outlet hose. Then hook up your outlet house with your high-power hose. You can select different tips to place at the end of your hose. Most pressure washers will have a wand which can allow you to control turning on and off the sprayer easily. Find out which tip is best for your project. Some pressure washers can be powerful enough to tear right through your siding. Test a discrete area to see which tip is best for the job.

Stucco Specifics

Since we are in Arizona, stucco is the most popular siding option in our area. To make sure you properly use your power washer on your stucco siding, you will want to be cognitive of the following: 

  • First, you should look for chips or cracks in the stucco. You do this because water can come in through those areas. If there is a crack or chip, it will need to be filled before beginning. 
  • Next, you will want to spray the pressure washer in sections. Each section should be completely rinsed, have detergent applied, and completely rinsed again before moving onto your next section.
  • Additionally, while you apply the detergent, you should water the area to soak up some of the excess detergent on your stucco walls.
  • Lastly, you will want a 20-degree nozzle for a standard surface. With your intense stains, place a rotating scrub brush on the hose. 

Since stucco differs from other siding options, ask your pressure washer sales associates for a complete run-down before renting or even purchasing the pressure washer. This will ensure you fully understand its power and capabilities.

Pressure washing your home is an effective way to get rid of dirt and grime. Be very careful when using a high PSI pressure washer. Do not use this on windows or on your car because it can damage them. For more insight on exterior cleaning, make sure to subscribe.

How to Make a Healthier Mac & Cheese

As everyone knows, macaroni and cheese is known for being a “comfort food” soothing ability! If you love mac and cheese as much as we do, please see our tips below for making a healthier recipe for the family.

Add Vegetables

You will want to add vegetables according to the season. Peas, tomatoes, corn, squash, green beans, and almost any other vegetable make the perfect topping for the mac and cheese. The wonderful golden cheese is the perfect backdrop for hiding a few veggies for picky children. You are also adding fiber and delightful nutrients to the golden mac and cheese!

Switch out Your Pasta 

Normally, mac and cheese in a prepackaged box contain refined pasta. Switch this out with a whole wheat pasta to increase fiber, minerals, and vitamins. You can also add chickpeas to increase plant-based proteins. 

Use Different Cheeses

As you know, a ton of fat and cholesterol are in a prepackaged mac and cheese. If you choose to use a cheese that is lower in fat or even use a little bit of cottage cheese to fill in, is a great way to reduce the saturated fat and cholesterol in your side dish.

Add to Your Sauce

Now, pull out your food processor and puree some veggies like cauliflower and carrots. This is a perfect way to sneak veggies into the good ole mac and cheese! Again, you are adding fiber and nutrients without the little ones noticing.

Use Other Milk

This is a no brainer, instead of using whole milk try adding a milk alternative like almond, soy or coconut milk. Do not use heavy cream; try substituting half and half for the cream sauce.

Avoid Adding Meats

Do not add hotdogs or bacon to your mac and cheese. You will eliminate a ton of calories, fat, and cholesterol in doing so. Again, only add good things like vegetables for the perfect mac and cheese.

Do Not Bake Your Mac & Cheese

Typically, when we bake mac and cheese, we add additional cheese and breadcrumbs to the top, so it is best not to do this. Simply make your mac and cheese in a handy skillet to eliminate the extra cheese and breadcrumbs. You will cut down on lots of calories and fat when doing so.

We hope you enjoyed these tricks and happy cooking!

What Are the Dirtiest Areas of Your Home?

The truth is, no matter how often you clean your home; there is bound to be dirt in every corner and sometimes even in unexpected spots. In fact, according to the Society for General Microbiology, germs and bacteria can divide every twenty minutes in the right environment and climate. A study conducted by the group revealed that there were over 300 different types of bacteria that were found on just thirty diverse objects. That being said, you may be interested in what are the dirtiest areas of your home. Today, we are going to take a look at them and how you can keep them clean. Let’s get started!

Kitchen 

Many studies have found that the kitchen is the dirtiest area of the home. Areas, where the food is prepared or stored, can have more bacteria and fecal matter contamination than the bathroom. You will even find that the dish sponge or cloth is heavily contaminated. Other items in the kitchen that are susceptible to contamination include: 

  • The coffee maker 
  • Kitchen countertops 
  • Refrigerator 

Cleaning Routine: You can try and keep the kitchen germ-free, especially when you are gearing up to prepare a meal. You can do so by using disinfectant wipes on all the surfaces in the kitchen, including the countertops, faucet, and refrigerator. Additionally, before washing your dishes with the sponge or washcloth, you can place it in the microwave to kill off the bacteria. You can even soak it in a warm, bleach water and throw it in the washing machine. Remember to switch out dish towels at least once a week.

Door Handles and Switches

You cannot forget about the doorknobs and switches since these are the least obvious place for germs in the house. While you would think the bathroom knob would be the dirtiest of them all, it is actually spots on the door that are much higher. Some areas that ranked high with bacteria is :

  • Refrigerator handle
  • Stove knobs
  • Microwave handles

Cleaning Routine: Try cleaning these spots with a disinfectant spray every day.

Laundry

Did you know that leaving your laundry in the washing machine for a little bit of time can cause germs to fester?

Cleaning Routine: It is important to remove your clothing articles from the washing machine once they are done and place them in the dryer or hang them to dry.

Were you surprised by any of the listed items? Is there anything that you make sure to clean that you think we missed? If so, be sure to leave us a message in the comment section.

The Best Fabric for Family Room Furniture

Are you currently in the market for purchasing new living room furniture or reupholstering your current furniture? If you are currently in the market for investing in a sofa/chair, it should be treated as a big decision that requires some research. We have compiled a short list of “to-dos” for determining the correct color and fabric for your pieces. Let’s take a look!

Color

If hiring an interior designer is not in the budget, we have listed some questions that will guide you in the right direction for the perfect fabric color:

  • Who Will Be Using the Pieces? If children, pets, or teenagers are in the answer, darker colors are the best for hiding stains and spills. For neutral options, grays are popular and will be around for quite some time. Do not overlook blues and greens and treat them as bold neutrals. View the carpet, flooring, and all accessories to make sure they blend with the new fabric. 
  • Formal or Informal? If you are placing the furniture in a formal living room, the color may differ from the color choice you would choose for an informal living room. For example, you may opt for lighter colors in a formal area since it will be used less and only for special occasions.
  • Are Patterns Relevant? While we do not see that many patterned sofas anymore, we do see sofas brought to life by patterned pillows and blankets. Incorporating patterns through pillows and blankets can help hide additional stains, which is ideal for households with children and pets.

Fabric

Natural fibers like cotton, linen, silk, and wool are very soft to the touch but are not very durable. When you combine them with a synthetic fiber like polyester, viscose, and acrylics, the softness remains, but the added synthetic fibers strengthen the natural fibers. All of the children and pet-friendly fibers are synthetic and also stand up to spills and stains. Heavier or thicker fabric weaves are less smooth but more textured. These fibers are perfect for a family or great room pieces.

Cleaning Code 

Have you ever noticed the tag on upholstered furniture? It will include a letter code. Sofas with a “W” must be cleaned with a water-based cleaner only/distilled, or bottled water is recommended. An “S” means the upholstery must be cleaned with a professional-grade cleaning solvent and will not react well if water is used. “S/W” means that dry cleaning solvents and water can be used. 

Rub-Count

This is the best way to determine the durability of the fabric. The rub count is determined by a machine that rubs back and forth until the fabric is worn down. 20,000 and higher rubs are perfect for residential upholstery.

We hope that you are now aware of what to look for when purchasing or reupholstering your family/great room furniture. If you follow these tips, you will make sure that you have done your due diligence in fabric research!