How to Have the Perfect Tea Time

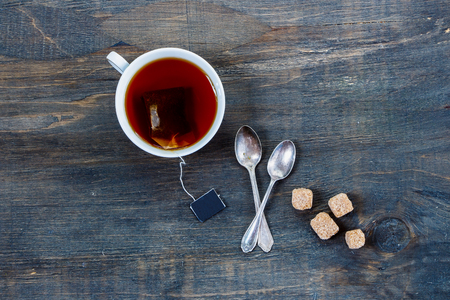
Imagine enjoying the beautiful outdoors while slowly sipping on a fresh cup of tea that you made all by yourself. Not only did you brew this tea, but you lovingly filled the tea bag with your favorite herbal blend. Tea is the perfect treat for warm or cooler weather and has an immense amount of health benefits.

Why You Should Drink Tea:

  • Tea contains a high level of antioxidants which help us to look and feel young. Who does not want that?
  • Tea can promote healthy weight loss.
  • Tea is great for your smile. Drinking tea helps fight cavities and unwanted erosion (that is something to smile about).
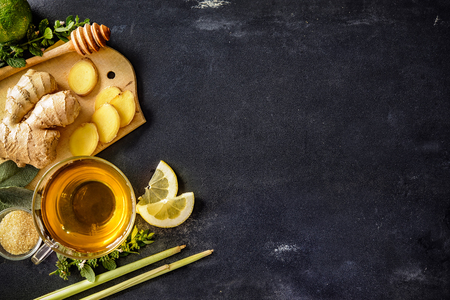
  • Tea is great for when you are ill. Tea can help boost your immune system and help you to recover faster. Try adding in honey and lemon to your tea for extra benefits.
  • Tea has less caffeine than soda or coffee and a lot of times, it contains less sugar.

Supplies to Make and Brew Your Own Tea Bag:

  • Your absolute favorite loose leaf tea
  • 1 Coffee Filter
  • 1 Writing Utensil
  • 1 Pair of Scissors
  • 1 Needle
  • 1 Piece of Thread

Step One. Pick up your coffee filter and your writing utensil of choice. Now, draw a circle on the coffee filter.
Step Two. Take your needle and thread and begin to sew around the circle you just drew. You will need to leave 1/4 of the circle unthreaded (this is where you will insert your tea leaves).
Step Three. Grab your scissors and begin to cut out the threaded circle.
Step Four. Fill your teabag with your favorite loose leaf tea.
Step Five. After you have filled your tea bag, you will begin to sew the opening closed.
Step Six. Time to brew your tea. Place your teabag in a boiling cup of water and let it sit for about five minutes. If you want to make a pitcher of iced tea, make about ten teabags and let them steep in a pot of boiling water for five minutes. After they have time to steep, place your tea pitcher in the fridge and let it sit overnight. The next day you can pour your tea over a glass of ice and voila, you have delicious iced tea.
Step Seven: Sip and enjoy!

Personalized teabags are great gifts for friends and family members! Next time your loved one is sick, try making them a couple of personalized teabags. Your special touch will make the gift extremely meaningful.

Tips for Tackling Your Daily Household Chores

With the high demands everyday life, household chores can become quite a daunting task. We dedicate all our time to work, family, friends, events, and even our physical health that it can seem overwhelming to set aside time for chores. Unfortunately, the longer you procrastinate your daily housework, the more encumbering the task becomes. To help, we put together five general rules that you should establish in your own space to prevent your chores from piling up on you. Developing these tricks in your daily life can help keep your home looking clean and well-kept. Let’s take a look!

One-Touch-Method

The one-touch-method is a great trick to start using in your own space. It is a general rule of thumb that declares, when you return home, you can only touch your belongings one time. For example, do not just come into your home place your mail and your coats in a temporary spot that you will “get to later.” Everything must be sorted and placed away at time of arrival in your home. It will help ensure a cleaner space and prevent clutter from accumulating.

Empty Countertops

If you struggle with clutter or chores building up in your home, you should try to keep your countertops always clear of everything. Do not allow anything on your countertops. Everything should have a designated place in a drawer or cabinet. It makes it very easy to identify items on your counter space. This minimalist approach may take a couple of extra seconds to put away coffee makers or blenders, but it prevents chores from accumulating throughout the week.

Everything Belongs Somewhere

This brings us to our next great trick: everything in your home should have a designated place of residency. Your cleaning supplies, your books, your tools, even your shoes should all have a place they are continually stored. This will make it easier to find your belongings and take care of chores as they come throughout the day. When you are done with an item, return it to its assigned location.

Laundry and Dishes

Here are two chores that will never go away: laundry and dishes. With dishes, try to clean as you cook. Do not allow downtime in the kitchen while food is boiling or in the oven. It can be an easy way to help prevent the buildup in the sink. When you are done eating, account for cleanup time as well. You can also wash your clothes every night or establish a laundry day for later in the week.

Try to tackle a few of your chores every day to prevent them from accumulating. Tasks can quickly become overwhelming, but with a little time management, they can become less daunting. Remember to establish days in your week to work on more significant projects in your chore list. For more great tips, make sure to subscribe!

How to Create a Stylish DIY Tabletop Fire Pit

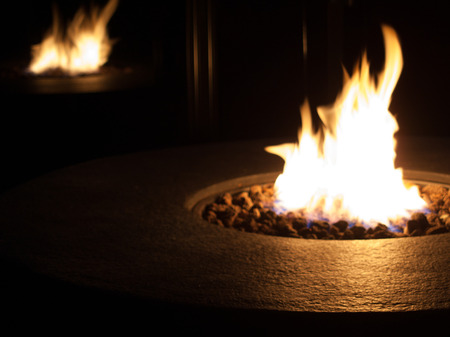
There is nothing more romantic than relaxing by the fire on a breezy Arizona night. Just the idea of socializing by a warm fire sounds peaceful and alluring to all busy homeowners. The outdoors is the perfect setting for get-togethers and deep conversations. Make a statement at your next social gathering with a Do-It-Yourself Tabletop Fire Pit. You will find that tabletop fire pits are stunning! They bring warmth and beauty to your outdoor space, plus they are easy to create!

Supplies:

  • Ceramic Planter/Pot
  • Lava Rocks
  • Gel Fuel Cans (This can be bought at any home improvement store or online retailers).
  • Lighter or Matches

How to make a Tabletop Fire Pit:

Preparation: Gather all the supplies from the list above and find a place outside to work on this project.

Step One: Once you have found a spot to work, place your lava rocks inside your ceramic planter. The ceramic planter you choose is completely based on your personal style. Since you will be filling the planter, look to purchase a larger ceramic pot for this project. The lava rocks should fill 3/4 of your ceramic planter.

Step Two: Now place your closed gel fuel cans onto of the lava rocks you just put in your planter.

Step Three: After you have positioned the gel fuel cans, you can continue to fill your planter to the top with your lava rocks. Make sure to place them surrounding your fuel cans and not on top of them.

Step Four: Leave the lids on until you want to lit your fire pit. Keep in mind the fire will only last approximately one and a half to two hours; therefore, wait to burn your fuel cans until your guests arrive.

Pro-Tip: Gel Fuel Cans are great for outdoor fires because the wind will help produce a greater flame. 

This tabletop fire pit is perfect for outdoor gatherings! Amaze your guests with this stunning, hand-crafted fire pit. The best part is that you made it all on your own. Just please make sure that the flame is entirely out before going back inside for the night.

Genius Cleaning Hacks for Pet Owners

Owning a pet can be one of the most exciting adventures in life. While pets bring us a lot of joy, we want to make sure that we keep them happy and healthy. To ensure your home is pet-friendly, we have created six cleaning tricks that every pet owner should know. Let us take a look!

The Dishwasher Trick

Just like people, your pet’s items need to be cleaned regularly. There can be a lot of germs and unwanted build-up on their toys and food dish. To help make sure they are happy and healthy, you will want to wash their items regularly. An easy and efficient way to do so is by using your dishwasher! Just place their plastic and rubber toys inside of the dishwasher with one tablespoon of baking soda. Let the dishwasher run a cycle and voila, they have clean toys in no time! Just let the toys dry off then you can place them back in their proper home.

The Squeegee Trick

Pets are amazing, but their hair…Not so much. To eliminate their hair from your rugs, you can run a squeegee over top of them. This works best for non-fluffy rugs, and you want to be aware that being too harsh could damage the fibers.

**We recommend always consulting the manufacturer’s website before attempting.

The Litter Pan Trick

Is your cat litter getting everywhere? Try placing a baking pan outside of the litter box. Line the pan with contact paper and remove the leftover litter frequently.

The Room Deodorizer Trick

Chemicals are not good for your pets; therefore, we recommend creating your own natural deodorizer. In a spray bottle, you will want to add 1/2 cup of warm water, two tablespoons of baking soda and 1/2 cup of vinegar. Afterward, you can add a pet-friendly essential oil like peppermint to help create a refreshing scent. Spray the mixture and let it sit for a couple of hours then vacuum as needed.

**Peppermint essential oil is safe in small doses. Please consult your veterinary before using any essential oils near your pets.

The Dog Bed Trick

Just like our beds, dog beds need to be washed. For a quick clean, place your dog bed cover in the washing machine for a cycle.

The Brushing Trick

If the weather permits, always brush your pet’s hair outside. This will help ensure no dog hair gets traced into the home and helps avoid future cleaning.

We hope you enjoyed these tips and tricks. Check back weekly for more blogs and updates.

Operation Organization in Ten Minutes

When we think of undergoing an organization project in our home, we think of it as a daunting, long task that will take up a lot of our day. While organizing areas in our house, the mere thought of beginning these tasks can influence us to procrastinate. However, what if you could organize areas in your home in only ten minutes We all have ten minutes in our day to spare. While this may seem too good to be true, you would be amazed at how much you are able to accomplish in your home in just ten minutes. Now, you will need to stay focused and keep moving, but with our Ten Minute checklist, you can quickly get your rooms reorganized. Here is our Ten Minute Checklist to help you reorganize areas in your own home:

Break Larger Projects into Smaller Tasks

Some tasks can be very overwhelming at first. Maybe you want to organize your bathroom, clean a closet, or declutter your garage. These larger tasks can take time. Try to look at areas then break them into smaller projects. For example, maybe you have been procrastinating organizing your bathroom for some time. You have clutter drawers, unfolded towels, and toiletries that have no designated homes. Instead of tackling everything at once and deep cleaning the room, try to find a more obtainable task. Tell yourself you are going to organize one drawer every day. Using this simple tactic is a great way to start making some serious headway on big projects.

Declutter

When you find the task that you are going to accomplish, start by decluttering. A cluttered drawer or closet can visually be overwhelming. Pull everything out of the space you are working on cleaning. By spreading the mess, you can quickly identify what goes where. Since clutter is one of the main visual intimidations that prevent us from starting a task, you can begin by decluttering the area that you are more likely to accomplish.

Trash/Donate

Once everything is pulled out, decide what trash is and what will stay. By eliminating items and belongings that were once cluttering the area, you will be able to put the area back together into a more organized look. Decide if any things are no longer of value to you. Maybe they are still valuable and worth donating to others. Some items may just blatantly be in the wrong spot in your home.

Organize

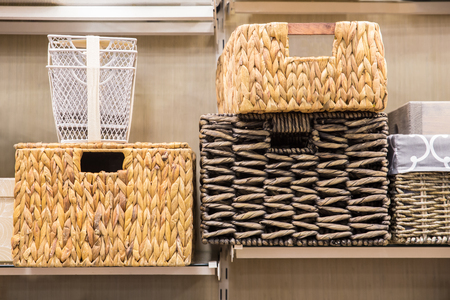
Lastly, with your time remaining, put everything back into your drawer. Using bins or baskets is an easy way to organize belongings. Return everything to the original spot in a more focused and organized manner. You will be surprised what some focus and ten minutes can accomplish!

Do you have areas in your home that demand attention Try this organization checklist to help get you started. You will be amazed at what you are able to get done in ten minutes. For more great tips, visit us at Fulton Homes.
Helpful Tips for Making Fresh Flowers Last Longer

We just love fresh cut flowers as most people do. They bring a smile to our face and make one think of nature and all it has to offer. Whether you have received flowers from your significant other or you just purchased a bouquet from the market, we have some tips below that will help to keep them around longer to enjoy! 

Always Trim Stems

As soon as you receive, trim the bottom of the stems about ½ inch with sharp scissors and cut at an angle. Make sure that any blooms or leaves are not underwater, cut these off. This will keep the water cleaner and your flowers will last longer. If they do start to droop just trim the bottom of the stems off again.

Choose The Perfect Vase

Next, you will want to head into the kitchen and start looking for a suitable vase like mason ars or anything decorative that can hold water and the flowers. If you have that beautiful crystal vase or that amazing hand-made piece of pottery, these can be beautiful options for your flowers’ home.

Clean Vase

This step is so important for your flowers to last. Before using a vase wash it in detergent, hot water with a little white vinegar to kill any and all bacteria. If you don’t do this your flowers won’t last hardly anytime. You need to empty, rewash and refill with clean water at the first sign of murky water. 

Where to Place?

Experts recommend keeping fresh flowers out of direct sunlight and away from extreme heat. Heat will cause your flowers to crumple up and fade quickly. Also, keep in mind that fruit emits a gas called ethylene which will cause your flowers to live a shorter life cycle; therefore, keep fruits away from fresh cut flowers.

Fill in with New Flowers

When some flowers start to fade simply go to the market and buy a new bouquet for under $ 10. Remove the faded flowers and fill in with new ones. Now is the perfect time to add a little extra greenery from the new bouquet. Also, we recommend washing the vase out with detergent and vinegar to kill any bacteria. 

What are your favorite indoor flowers? We would love to hear your thoughts below in the comment section.

Peanut Butter Hacks for Your Home

Peanut Butter is not only a delicious spread, but it serves several functions you may have not realized. Next time you are in a predicament just pull out your Peanut Butter. Let us take a look at the different ways Peanut Butter can help:

Gets out Gum

If you have been lucky enough and have not experienced getting gum in your hair then count your blessings. Getting gum stuck in your hair can be one of the most terrifying experiences especially for small children, but Peanut Butter is here to save the day! Take some Peanut Butter and an ice cube and slowly work the gum out of the person’s hair. They will definitely need to take a shower afterward, but it is far better than having to chop off all of their hair. 

Removes Stickers

Another sticky substance that Peanut Butter helps to remove are stickers. You can use Peanut Butter to remove stubborn sticker labels that are placed on bottles. Simply grab a washcloth and your Peanut Butter and start scrubbing the sticker area. You will be surprised how well Peanut Butter works. You can also try this trick on stickers that your little ones may have placed around the house.

Odor Repellant

Peanut Butter helps to eliminate odors found in the kitchen after cooking. In order to eliminate the strong scents, place 2 tablespoons of Peanut Butter into the cookware that you used. Let the Peanut Butter sit before washing. 

Pet Pills

A quick trick — cover a pet pill in peanut butter to help your furry friend eat their medicine. Peanut Butter hides the tablet in delicious creamy goodness and encourages your pet to eat it.

Scratches

It may quite possibly be the oily found in Peanut Butter because it is great for getting scratches out of items. You can use it on scratched CD’s, leather couches, and wood furniture. Take a dry cloth with a dab of Peanut Butter to remove the scratches. Let the peanut butter sit in the wood furniture for approximately one hour before whipping it off of the surface.

Moisturizer

The oils in Peanut Butter can be great for your skin and hair. Use on your hair in the shower before you shampoo your locks. Also, Peanut Butter can be substituted for shaving cream. If you are a fan of chunky peanut butter, you can use it as an exfoliator in the shower. 

Peanut Butter is an extremely versatile item to have in your household. When in doubt, consider using your Peanut Butter! 

Well-Loved Arizona Attractions and Facts

The United States is the third largest country in the world, hence its diverse geographic landscape it has to offer.  From broad flatlands to volcanic mountains, glacier filled waters to a hot desert, or even extensive rivers to Great Lakes, our country has so much to offer.  One state that is to be recognized with its abundance of visual natural wonders is Arizona.  Arizona is a beautiful state with nearly three-hundred of the days of the year having blue skies and sunny!  With three national parks, desert and mountainous landscape, and incredible cities, Arizona is packed with activities and attractions. This state has so much to offer, so if you are living there or just visiting, here are the top interesting facts. 

Grand Canyon

Kickstarting the list is one of Arizona’s most renowned National Parks, the Grand Canyon.  This spectacular canyon is a geographic phenomenon decorated with colorful eroded rocks, rivers, and truly immense in size.  No picture can truly justify just how breathtaking this canyon is in person. 

Largest Rose Bush 

In Tombstone, Arizona, back in 1885, The Lady Banksia Rosebush was planted.  Today this single bush’s canopy is over 9,000 square feet of white-blossomed roses.  It is planted behind a former hotel and boarding house but is now a large attraction pulling in tourist into the town. 

Apache Trout  

Native to only Arizona is the Apache trout and because of this, it is Arizona’s State Fish.  This species was close to going extinct due to non-indigenous being introduced into the ecosystem.  However, these fish are making a slow and steady comeback and should be here for a long time now. 

Four Corners Monument 

Ever want to be two places at once?  How about four?  Four Corners Monument is where Utah, Arizona, Colorado, and New Mexico all meet.  While this is something you can achieve in any of these other states, it is still worthy of being mentioned for Arizona. 

Make sure you check out many of the national parks or other areas while in Arizona.  It is said to be believed that you can travel anyway in Arizona and within twenty miles you will arrive in a city, monumental area, landmark, or park.  Where is your favorite spot in Arizona?  Let us know below in the comment section. 

Understanding How Texture is Used Throughout Design

When it comes to designing an interior, considering “texture” is often an afterthought. Texture is an element of design that can be defined as “the sensations that are evoked by the external surface that one can feel through touch.” In fact, think about how it feels to sink your feet through a plush carpet, or the feeling of a leather couch beneath you. Texture can be perceived as either tactile or visual. Tactile is the actual feeling of an object such as smooth or rough. Visual texture is what one thinks an object may feel like, and visual texture assumptions are made based on the material of the object. So, you may be wondering what the importance of texture in interior design is? We are here to tell you in two brief points; let’s take a look! 

Texture Adds Visual Weight 

Texture adds visual weight to a space. Rougher surfaces can make a space feel intimidating while softer texture can give off a luxurious feel. When a designer mixes the two textures together in a space, it is often to create balance. Since rougher surfaces can feel heavier, we recommend implementing a distance/space between the two pieces to help harmonize the design. 

Texture Can Create Balance 

Of course, when using texture in your design, be sure to keep in mind balance. While contrast is essential to create emphasis, you do not want to go crazy by using too many textures. Utilize no more than three textures in one space because using too many makes the design scheme feel overwhelming. Be sure to only use textures to highlight the most important areas in the room. You can easily implement texturized decor in your home through architectural elements, furnishings and decor items such as rugs and textiles.

What are your thoughts on texture? Do you find yourself using it a lot in your design or not often enough? We would love to hear your thoughts below in the comment section.

The Ultimate Bedroom Cleaning List

Bedrooms should be cleaned often because of the amount of dust, dirt, and allergens that can become easily trapped in your space. Try to clean your home’s bedrooms once a week to help remove any unwanted dirt and dust. Before you begin, open the room’s windows to give the room fresh air and a nice air flow.

Clothes

Take all your dirty clothes to the laundry room and place all clean clothes in their proper place.

  • Every season, you should move the current season’s clothing to the front of the closet then move last season’s clothes to the back of the closet. For example, it is currently February; therefore, you would move your winter clothing to the back of the closet and bring your spring clothing to the front of the closet.

Flooring

Vacuum your bedroom floors to collect any dust and dirt that may have been tracked into the room. If you have hardwood floors, you should mop your floors with a basic floor cleaner.

  • You can make your own floor cleaner by mixing together 2 cups of hot water with 2 cups of white vinegar in a bucket. This floor cleaner will dry on its own; there is no need to rinse.

Mattress

Undress your mattress and put all the linens into the washing machine. While your bed is undressed, lightly sprinkle baking soda on top of the mattress and let it sit. After your linens are washed and dried, vacuum the mattress to remove any excess baking soda.

Bedding

Now, redress your bed with your clean bedding and linens.

Windows

Take window cleaner and clean your windows off in a circular motion. If you have window ledges, remember to remove any dust that may be on the ledge. Every six months, take your curtains and put them into the washing machine. Dust can build up on your curtains, and it is essential to make sure that they are cleaned.

Dusting

Take a feather duster and go over your ceiling fan, blinds, picture frames, furniture, etc.

Candles

Close your windows then light your favorite candle to freshen up the bedroom as a final finishing touch.

With a fresh and clean bedroom, you can relax and enjoy your clean oasis. We hope you enjoyed these tips and tricks! For more advice, be sure to subscribe.